Hand built versus Master built .... what's the difference?

Is a hand built wheel better than a factory built wheel? And what exactly is the difference and does it matter to you as the consumer? How does a Master Built wheel differ from one that’s identified as hand built? I will try to explain the difference in layman’s terms and give you some insights into the superiority of a truly Master Built wheel.

Let’s begin with what a hand built is. In reality virtually every wheel is finished by hand and therefore you wouldn’t be lying if you said that a factory wheel was hand built.

A factory built wheel starts its life in a lacing machine that quickly assembles a wheel to the point that it will need to be handed over to a wheel builder to be trued and provided finished tension. Hopefully that wheel builder will also do some de-stressing work which will simulate riding the wheel to stop it from going out of true once it hits the road.

So, doesn’t that mean that you now have a well built wheel? In a word, no. There’s absolutely no guarantee that sufficient time was given to provide a safe or well built wheel.

Wheel building factories are often driven by daily quotas for the builders which means that wheels are built WAY too fast to achieve satisfactory results. Wheels built in this manor are often the sum of many compromises that are a result of spending too little time to achieve outstanding results.

So if a company states in their advertising that their wheels are “hand built” this may be a little deceiving. Claiming that a wheel is handbuilt really means nothing in this day and age.

If we step back in time before the era of these large wheel building factories I will explain what “hand built” used to mean and why it carried a certain status that it no longer has and why a different moniker is needed to separate the men from the boys shall we say.

Many years ago the term “hand built” meant that your wheel was built by an artisan who specialized in building the best wheels money could buy. That “Master Builder” had many years of experience and his talents and knowledge were very sought after by those who demanded the best quality available.

No one became a Master Builder over night. This status took a long time to attain and usually the people who could lay claim to it were very well known for their unique skills.

In the modern era there are people who can lay claim to being a true master wheel builder. And they may have much more than the 10,000 hours that some say defines someone who has mastered their trade.

But you won’t find that person in every city and sadly not at many bike shops these days. These elite wheel builders are usually heading up small artisanal wheel building companies and toiling away in their humble workshops.

So what defines a Master Builder? Is it merely the amount of time that he’s been at it?

Building wheels to the highest level for many years is certainly what would put you on the road to obtaining that elite status, but one must keep up with the times and refine ones methodology and keep pace with the latest and most sophisticated tools available.

Tools themselves don’t build great wheels but they can definitely enable you to work at a much higher level of repeatable accuracy.

The Master Builder will be conversant with all the latest tools and they will have informed his methods. He will also have been exposed to the latest technology in rims and hubs.

These days the best quality rims are of course made of carbon fibre. Carbon rims offer up their own challenges and extensive experience in building is needed to work with carbon fibre properly. To think otherwise shows a lack of proper experience.

Someone who is merely a part time builder should leave that carbon build to someone else with that much needed experience.

If you are thinking of getting an upgrade to some “hand built wheels” consider contacting someone who is a bonafide “Master Builder”. This will guarantee peace of mind that your wheels were built to the highest standards known. This will mean they will possess an incredible ride quality, and built at the optimum tension for your weight and cycling style.

A tailored pair of wheels that will last for many seasons, providing the unique feeling that only a set of Master Built wheels will give you.

As the owner of Cognoscenti Cycles, my first pair of wheels came off the truing stand in 1973.

Still learning every day and still chasing the perfect wheel!

Our Carbon Werx Vector 45mm disc rims laced to White Industries CLD hubs.

The Vector

I am very proud to announce our new filament wound road rim called the Vector. If you are unfamiliar with the technology behind filament winding then this may help you to appreciate just how special and unique these rims are. I should start off by mentioning that 99% of carbon fibre rims made today are manufactured with a tedious hand lay up process that requires skill, extensive experience and total focus. Simply put, not everyone is cut out for an exacting job like this. Needless to say, those who have these skills are of course very much in demand by top end carbon rim manufacturers.

But are there other ways to produce excellent carbon fibre products that don’t require such an intensely skilled work force? In a word, yes!

The process of filament winding carbon fibre actually goes back to the early 1960’s. So the process has a lengthy and successful history. But up until quite recently this technology had not been used in the world of carbon fibre bicycle rims.

Filament wound rims excel by profoundly reducing quality control issues often found in hand laid carbon fibre rims. Filament winding with Toray carbon fibre is done by a computer controlled machine that propels the accuracy and consistency beyond what we thought possible compared to anything done by hand. This sophisticated tech is the heart and soul of the Vector.

Upon a closer look at the Vector’s exterior you’ll immediately notice a series of complex intersecting lines that look like geometric shapes in a repeating pattern. This arabesque of intertwining carbon strands is a clever design that maximises the rims strength in the specific areas that need it the most.

The Vector employs state of the art carbon rim manufacturing techniques. A unique CNC process that uses Toray T700 carbon fibre to enhance overall accuracy and an improved strength to weight ratio.

I have built many filament wound rims over the last few years and I must say the quality is excellent and the consistency quite remarkable, far beyond any hand built rim available.

The Vector is a true road rim, available in a 24 hole spoke count with a 21mm internal width and a 28mm external width. Its 45mm deep and weighs in at 440 grams.

The 45mm depth is in my opinion the perfect depth for an ultimate road rim. Why? Because it offers a measurable aerodynamic boost, yet not so deep as to cause problems with handling when hit by a gust of wind. It also has plenty of lateral stiffness and strength and still maintains a nice light weight for climbing and sprinting. Really the best overall depth for any set of road wheels.

If cutting edge technology and sound design with a cloud nine ride quality are what you are after then the Vector ticks all the boxes. Get in touch and I’d be happy to build you some awesome road wheels.

The right tire choice.

In the last few decades we have seen definite improvements in tire design and the materials used to optimise everything from ride quality, to longevity to handling characteristics. These changes have also been seen in wheel designs and the materials used to optimise similar performance parameters.

I should quickly point out, that not all changes have been good in the world of wheels and we have to be careful about what we embrace as improvements. We all can succumb to great sounding advertising hype at times and not realise that we have been duped.

But generally speaking the good ideas get recognised by those who are truly in the know.

This article is about the importance of good tire choice and why it matters. If we spend a bundle on a fabulous set of hand built wheels that have been crafted with all our specific riding idiosyncracies in mind, but tire selection has not been considered properly you may end up with a set of wheels that are simply not performing all that impressively.

On the other hand, should you carefully consider tire choice and purchase tires that will certainly work best with all the other choices that went into your wheel design you’ll have the best of all worlds.

If we step back in time to the hay day of super fine hand made tubular tires we will see why the best racers in the world would pay whatever it took to get those phenomenal Clement Criterium Seta Extra tires! Every one of those incredible tires were carefully and methodically hand stitched by tire artisans with gorgeous 100% silk side walls and ultra light latex tubes.

This effort produced an absolute cloud nine ride that once experienced was never forgotten! I remember my first pair of “Seta Extras” as we used to call them and it was true a revelation in performance. Every other tire after that felt like crap by comparison.

Is there a modern day tire that has some of these special attributes?

The closest thing I have come across would be the Vittoria Corsa Contol 2.0 Grapehene.

No, it does not reclaim the high honours of the Seta Extra, but man it’s an incredible ride for a clincher tire, especially when it’s paired with the new ultra light TPU tubes like those made by Revoloop, Tubolito, Schwalbe, Vittoria and Pirelli.

The Vittoria Corsa Control 2.0 Graphene. Super fast and light with incredibly low rolling resistance.

The new Vittoria Corsa Pro Control. Another fabulous graphene infused tire with 320 threads per inch cotton sidewalls for superb comfort and speed. Available with contrasting tan sidewalls! The new protection strip apparently assures a 19% increase in puncture resistance.

Pirelli’s bright yellow Zero Smartube. Light weight and quite puncture resistant.

Vittoria has two elements to this tire that sets it apart from the competition. First is their use of high count 320 tpi cotton side walls. This invites a very comfortable ride quality even at fairly high tire pressures like 100psi. Maybe not quite as lovely as 100% silk, but pretty close. The next thing is the graphene infused rubber. To my knowledge Vittoria is the first company to put out a bicycle tire that contains graphene, which helps extend the life of the tire as well as giving it a unique feel on the road. Even with a very fine tread it seems to hug the pavement very well. This tire also has been tested independently and it has a very low rolling resistance making it one of the fastest tires available.

I have been using this particular tire for a few seasons now and I must say it’s a joy to ride. I am recommending it for all of my custom road builds these days. It’s the perfect match for the style of road wheels that I build. I always try to impart a very lively ride quality into my builds and I think the Vittoria Corsa Control 2.0 Graphene compliments this perfectly.

I have also thoroughly enjoyed their line of gravel tires. My go to choice for Ontario gravel is their Terenno Dry. I love the tread design which incorporates an overlapping fish scale pattern in the centre of the tire for good speed on pavement, but uses a proper set of raised knobs on the side to support you in light sand and gravel. I also use these tires with TPU tubes to great effect. Vittoria’s “designed in Italy and “made in Thailand” situation seems to be a perfect combo. Their tires are super high quality and are quite consistent. They are also very easy to instal which is a huge plus in my books. They work fine in a tubeless set up or with a tube.

I have found these particular gravel tires to compliment my custom gravel wheel builds ideally. A great tire choice is really the crown on the top of a great set of hand built wheels.

If you have any questions about what tires may better suite your riding style and your custom wheels, just give me a call and we’ll discuss!

The Cognoscenti Difference - What is it?

Is there any measurable difference in having your wheels built by Cognoscenti Cycles? Is it worth the wait or the money? Why bother? Will I actually notice the difference?

All excellent questions that deserve detailed and honest answers. I’ll attempt to shine some light on all these important questions.

Let’s face this fact. Any set of custom wheels in this day and age are not going to be cheap, but as the old adage goes, “you only get what you pay for”.

But is a custom build worth the extra cash? In a word I would say yes and I’ll explain what you are getting for your hard earned money.

In reality you have only two choices. You buy a factory built set of wheels or you hire a professional wheel builder to build you something totally custom.

These two choices have absolutely nothing to do with each other. They are miles apart and this is why people who want the best are lining up to get a hand built set of custom wheels.

Now, I won’t expend a ton of energy bashing factory built wheels but those who know this subject are well aware of the limitations and serious compromises that exist in every set of factory built wheels. I really do feel sorry for those poor wheel builders who are working on a factory floor trying to keep up with the daily quota they need to fill to keep their job.

I am sure most of them are also very aware of how much better their wheels could be if only given the proper amount of time and the right tools to finish the job properly.

These wheel building factories work for all the big names, so don’t think that just because your wheels have a world famous name on them that they can be trusted to perform at the level that you demand. That’s wishful thinking.

By contrast, any pro wheel builder will be working at such a high level that there will be no comparison.

Some gorgeous R45D hubs from our friends at Chris King in the new Midnight colour way. Now with a life time warranty!

So, here’s where Cognoscenti Cycles fits into this story.

With decades of experience building the finest wheels money can buy, I have gained a unique perspective. I have refined my process over the years to what I would call a fine tuned machine. That’s not bragging, that’s just a fact.

Will it get better? Yes, very likely, but that’s the natural evolution of mastering any trade, especially if you maintain your passion and curiosity.

So what has enabled me to develop unique wheel building techniques and special insights not shared by other builders, you might ask.

I would say the most important thing has been exposure to so many varied projects and cycling disciplines. In the end they are all bicycle wheels, but the variety of different kinds of wheels has helped to provide those unique insights. I would also say that getting feedback from top racers, world tourers and MTB and gravel racers/riders has increased my knowledge along the way.

Over the years there has been a lot of great tools that have come into existence that have improved wheel building or made it slightly easier or faster, though when I work I am never in a hurry. Taking your time is very important.

But many of those tools have increased the overall accuracy that’s improved wheels in a measurable way. This helps to improve the ride quality and extend the life of the wheel.

Over the years I have greatly extended the time I spend on each wheel. Why?

My methodology has changed and evolved and now utilises new tools like my Cognoscenti Cycles spoke tension meter. That tool alone now adds about an additional hour or more to every wheel build. The extra time spent now insures that every wheel has a much tighter tolerance in final spoke tension. That’s a big deal in helping to keep a wheel true and round over 10’s of thousands of miles. It also fine tunes ride quality.

Certainly a very significant change at Cognoscenti Cycles has been Carbon Werx.

Carbon Werx is our very own line of amazing carbon rims. I am super proud of this achievement and I truly feel our rims can go head to head with the big boys any day of the week. Truth be told, I know for a fact that our rims have better designs and far better quality control than the most expensive rims available. They are also made with the finest aero space grade Japanese Toray T700 & T 800 carbon fibre. Simply the best carbon available.

Building with this level of carbon rims puts our wheels into the next level. I’ve had nothing but great feedback from every cyclist on Carbon Werx rims.

Our new Carbon Werx Vector 50mm road rim. This filament wound rim is the height of carbon rim technology today and is made with Toray T700 carbon fibre.

We also have models for several cycling disciplines, like road, gravel, MTB and triathlons.

We continue to import our spokes from Sapim in Belgium, using their best quality CX Rays and CX Sprints for most of our builds. We also insist on using the worlds best spoke nipples from Alpina in Italy. Nothing but the best will do!

Every wheel built in my shop is built by me personally and has detailed documentation containing all the technical details of the build. That paper work is kept on file for future reference if needed.

I even write some of those details, like the spoke lengths used and the final spoke tension on the inside of the rim in case that information is needed when a wheel comes in for a diagnostic analysis.

Not even the smallest detail is overlooked.

When you contact me about a custom build that usually begins a lengthy dialogue about what your specific needs are and what your aspirations as a cyclist are. All this information will assist greatly in designing a set of wheels that make perfect sense for you.

This process is never rushed, so rest assured you’ll get all the information needed to make the right choices.

If you still have any questions about how Cognoscenti Cycles does things or if you’d like to talk wheels just get in touch. I can be reached during shop hours ( Mon to Friday: 11:00am to 5:00pm) at 647-221-2792

If you’d like to drop by to look at some rims or other components, or to ask questions about custom wheels, I work by appointment only. Please give me a call and we can set that up for a mutually agreeable time!


The Gravel King!

We are excited to announce the third gravel rim in the Carbon Werx gravel line up. If you recall, our very first gravel specific rim was the Gravel Head at 25mm deep and a featherweight of 350 grams. The ultimate uber light race day only rim. Our second offer was the Gravel Guru which is slightly deeper at 35mm and slightly heavier at 400 grams. Both of these rims have proven themselves in premier gravel races like Unbound and other similar challenging events in Canada, the USA and Europe.

Some riders have shown interest in a deeper rim still and this has given birth to a 40mm deep rim called the Gravel King.

This particular design also utilises an asymmetric compensation of 2.6mm which helps to minimise the disparity between the drive side and non drive side spoke tension. A very valuable feature that further strengthens the front and rear wheel.

This is especially important for any wheel that’s taking a bit of a beating which is bound to happen in some of your gravel excursions.

So what’s this rim made from? We have not strayed from the very best material available for any type of carbon rim. Again we are using Toray T700 for the highest quality carbon fibre available. With an unmatched strength to weight ratio you can’t do better.

These rims are available in a few different spoke counts that can be matched to the riders weight. Generally a recommended and time tested spoke count for a rider of average weight would be 28 holes. This enables me to build up a pair of very light but very strong wheels that will have the perfect balance of strength and stiffness but also offering that necessary degree of compliance for all day comfort in the saddle.

If a rider is quite light and wants to push the envelope with a slightly lighter set of wheels you could opt for the lightest version which would be a pair of 24 hole wheels or even a split set that utilised a 28 hole rear and a 24 hole front.

This is the clear advantage of custom built wheels. You have the option of dialing in the precise amount of stiffness and strength and compliance. No factory built wheel set gives you any of those options.

So why a 40mm rim? Based on my own extensive experience as a gravel rider and having built countless gravel wheels for riders of all levels of experience, I have come to the conclusion that 40mm has a place in the world of gravel. It’s about as deep as anyone should require, but some prefer the extra stiffness this depth of rim provides. This doesn’t mean a 40mm rim has lost all necessary compliance and comfort. There are ways to mitigate excessive stiffness in the building process by altering the lacing pattern and choice of spokes.

We opted for a 25.5 mm internal dimension and a 31mm external width. The wider internal will provide a nice shape for tires beyond 32mm in width.

The Carbon Werx Gravel King. An asymmetrically compensated gravel rim made from Japanese Toray T700 carbon fibre.

There’s also another hidden advantage to that wider internal dimension that doesn’t get talked about much. It enables you to ride slightly narrower gravel tires which will be lighter in weight, yet those same tires will measure a few millimetres wider when inflated. I’ll give you an example. I ride the 32mm Vittoria Terreno Dry gravel tires and when inflated they will measure 37.5mm if mounted to a rim with a 24 or 25mm internal. This means I get to ride a lighter tire but get the wider dimensions of one that’s heavier! A win win situation.

That’s a huge advantage if you are racing and trying to keep the weight of your wheels down.

The Gravel King weighs in at 440 grams. I think this is ideal for riders who aren’t suited for something as crazy light as the Gravel Head and want to have a worry free day on the back roads.

Even for the most dedicated gravel racer, the last thing you want to worry about is having a mechanical issue on race day, so a handful of extra grams on your rims may prove to be the wisest move you could make, and still land you on the podium.

To provide you with some aesthetic choices, you can choose your desired exterior weave. You can opt for a standard UD weave which is the plainest and least adorned of the bunch or something that shows the typical patterns found in carbon weaves like either the 3K or 12K.

Any of these exterior weaves can be finished in either a matte satin finish or a glossy finish.

If you have any questions about those decisions I’d be happy to walk you through your choices.

The Gravel King can be paired up with several different hubs that are perennial favourites for gravel use. Some of my personal favourites are White Industries CLD, Chris King R45D’s or DT Swiss 350’s. We can discuss the specs of these hubs as needed.


Air Pressure

PSI . Pounds per square inch. A way to measure just how much air is in your tire, right? If the gauge in your pump is accurate you should have a fairly good idea how much air is in your tires. Does it matter? Do we need to get really specific about how much air is in our tires?

In a word, yes. Air pressure has become a topic among cyclists that feeds heated debates and it’s a somewhat personal conclusion that one arrives at after some testing.

It can depend on quite a few factors. The riders weight, the type and model of tire used, the cycling discipline you plan to be doing.

For instance, someone racing cyclocross may be tempting fate with very low tire pressures in hopes of any kind of marginal gains they may receive with greater traction in mud, sand or grass.

A MTB rider may also be hoping to gain the highest level of performance with a very specific psi that maximises the interface between his tire and the terrain he’s traversing.

A triathlete may also be squeezing every bit of performance out of an ultra light set up that’s designed to shave a second or two off of his last fastest tme.

As you can quickly see, there’s a huge variance in how much air may end up in ones tires depending on the cycling discipline, the tire choice, and of course the riders physique.

A heavier rider will need more air to support his weight and there’s no way around that. It’s immaterial what type of event or bike he’s riding. Air equals support.

If there’s insufficient air in your tires you run the risk of bottoming out on your rim and very likely permanently damaging it, requiring a new rim. No carbon rim is made to sustain that kind of assault. You will very likely crack/damage your rim. So cyclocross riders, gravel riders and MTB riders keep this in mind when determining how low you choose to go with air pressure. It could be a costly error in judgement.

On the other end of the spectrum is very high pressure. Some time trialists may like the feel of a 100 psi tire. There’s nothing wrong with that, but make sure you have not exceeded the recommended tire pressure that you’ll find stamped on the side of your tire. Also keep in mind the potential expansion and increase of air pressure that can happen on a hot sunny day.

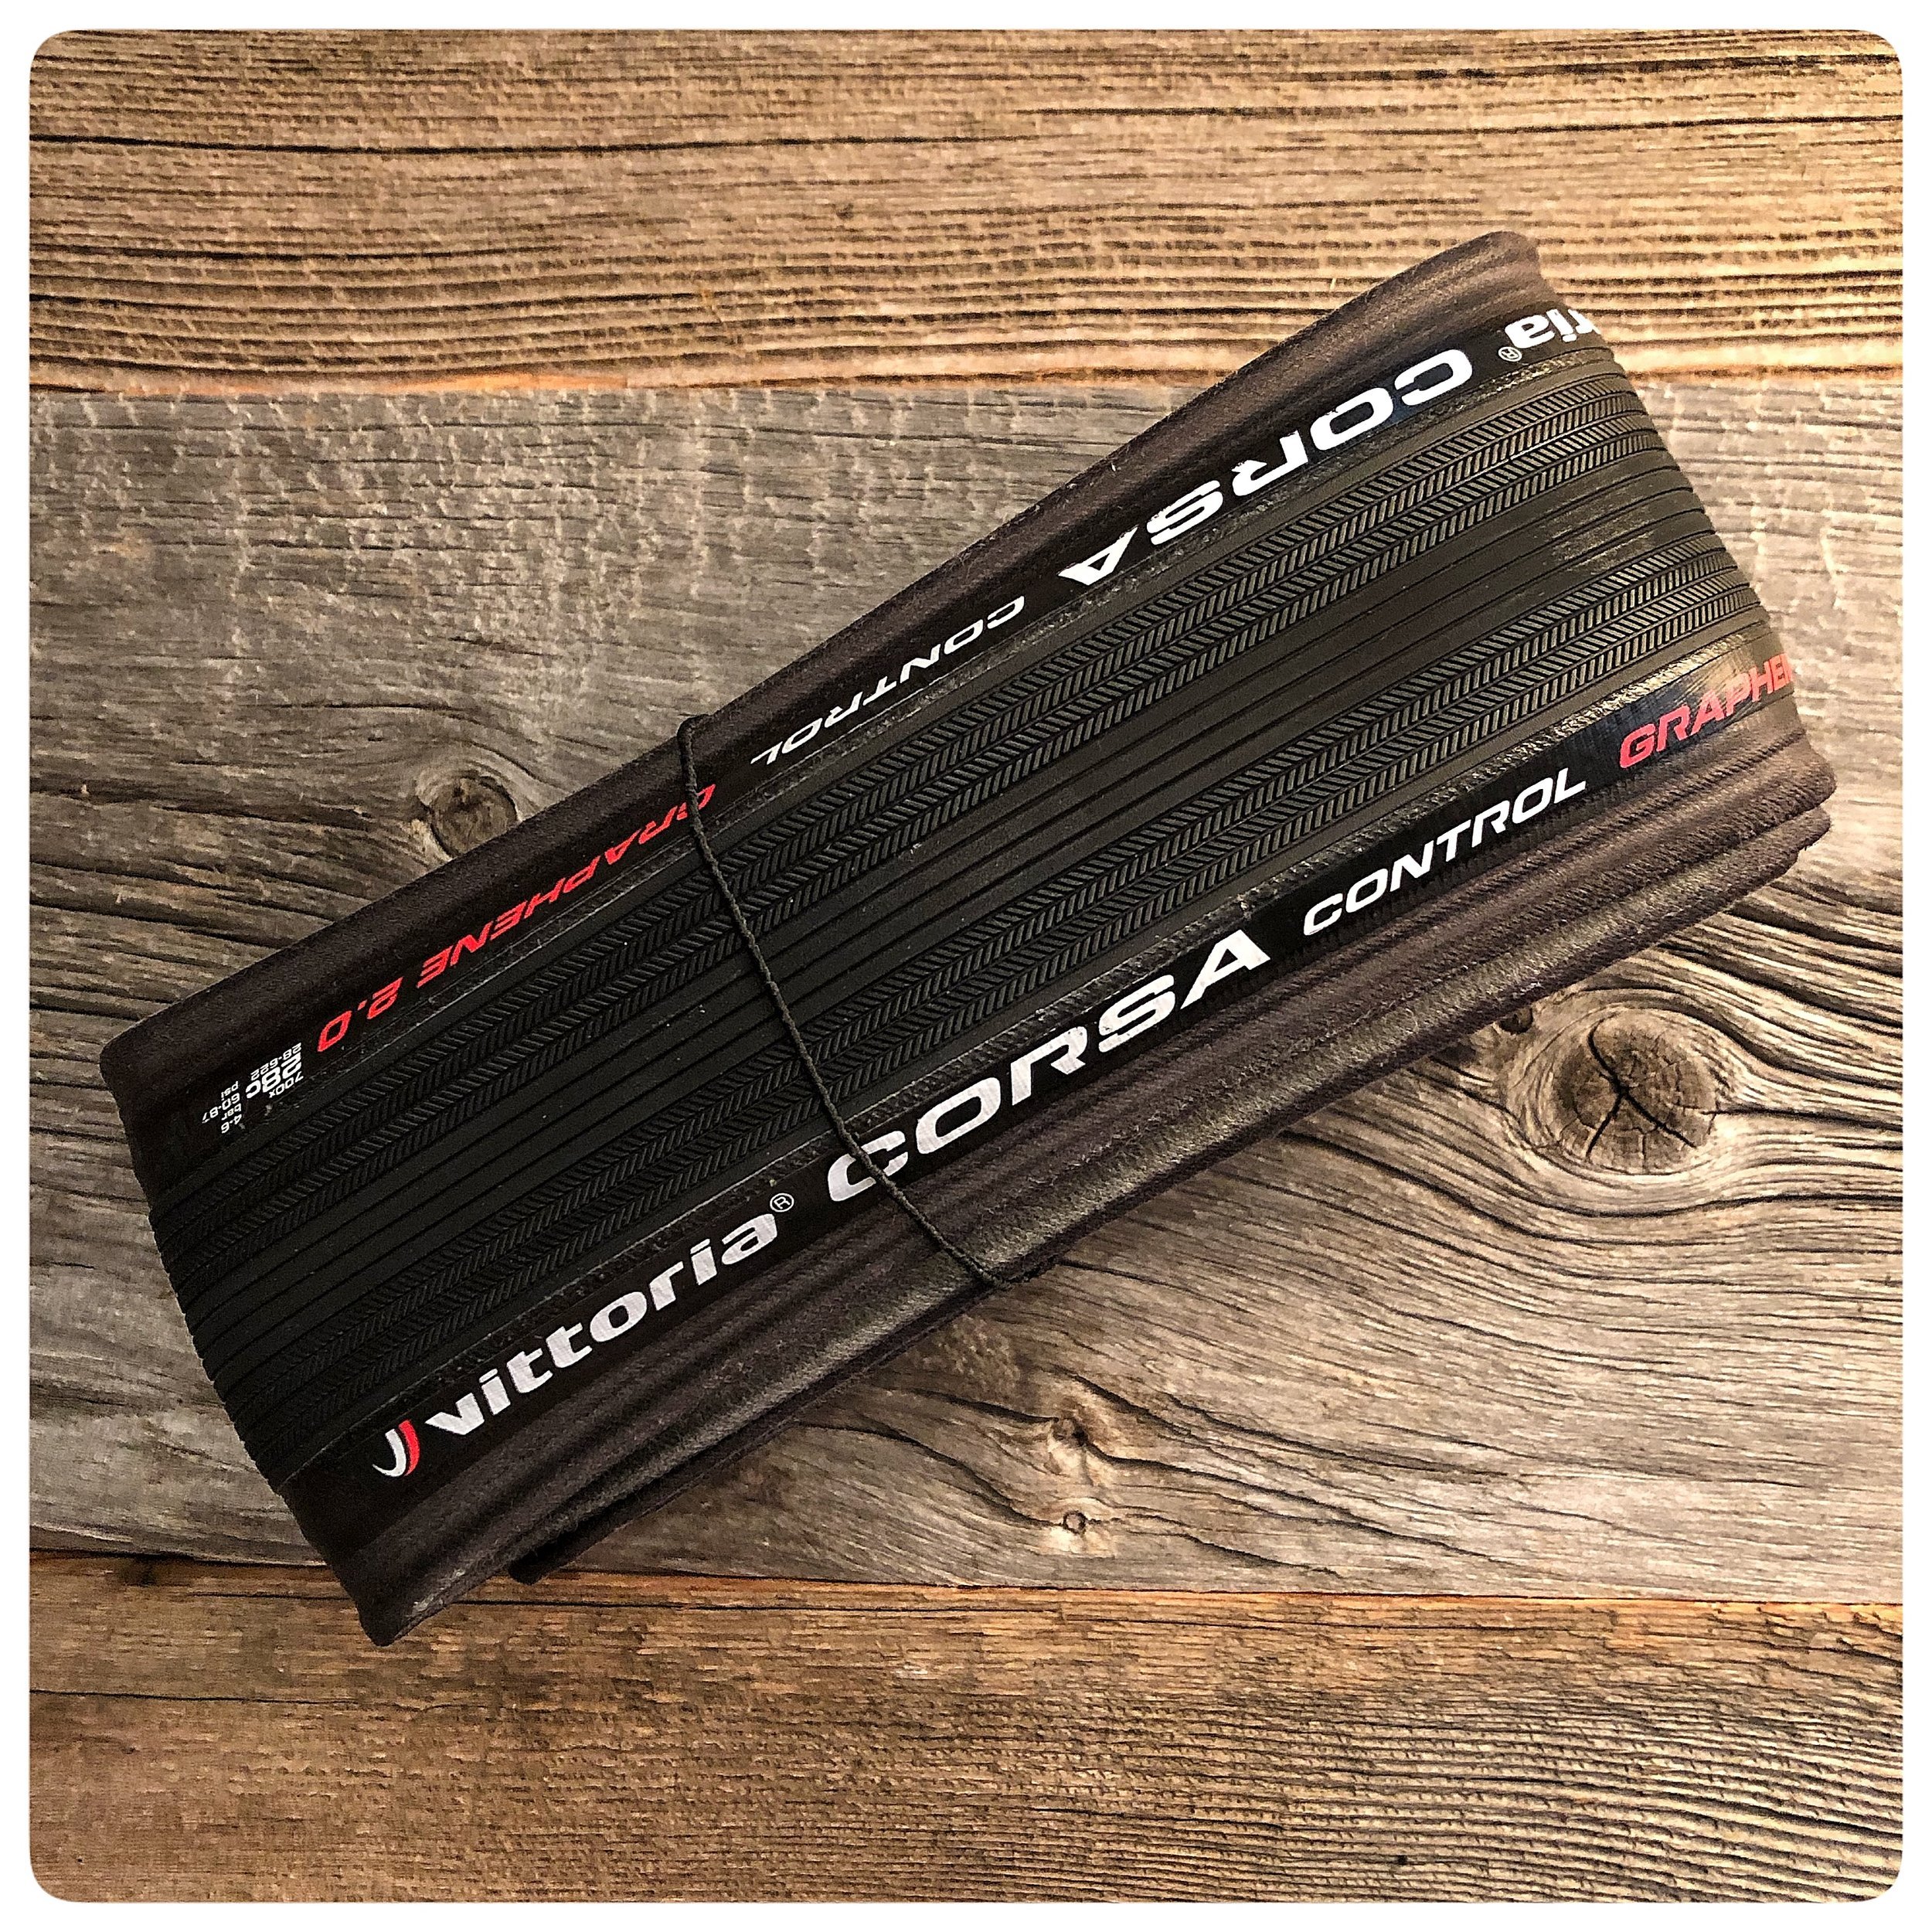
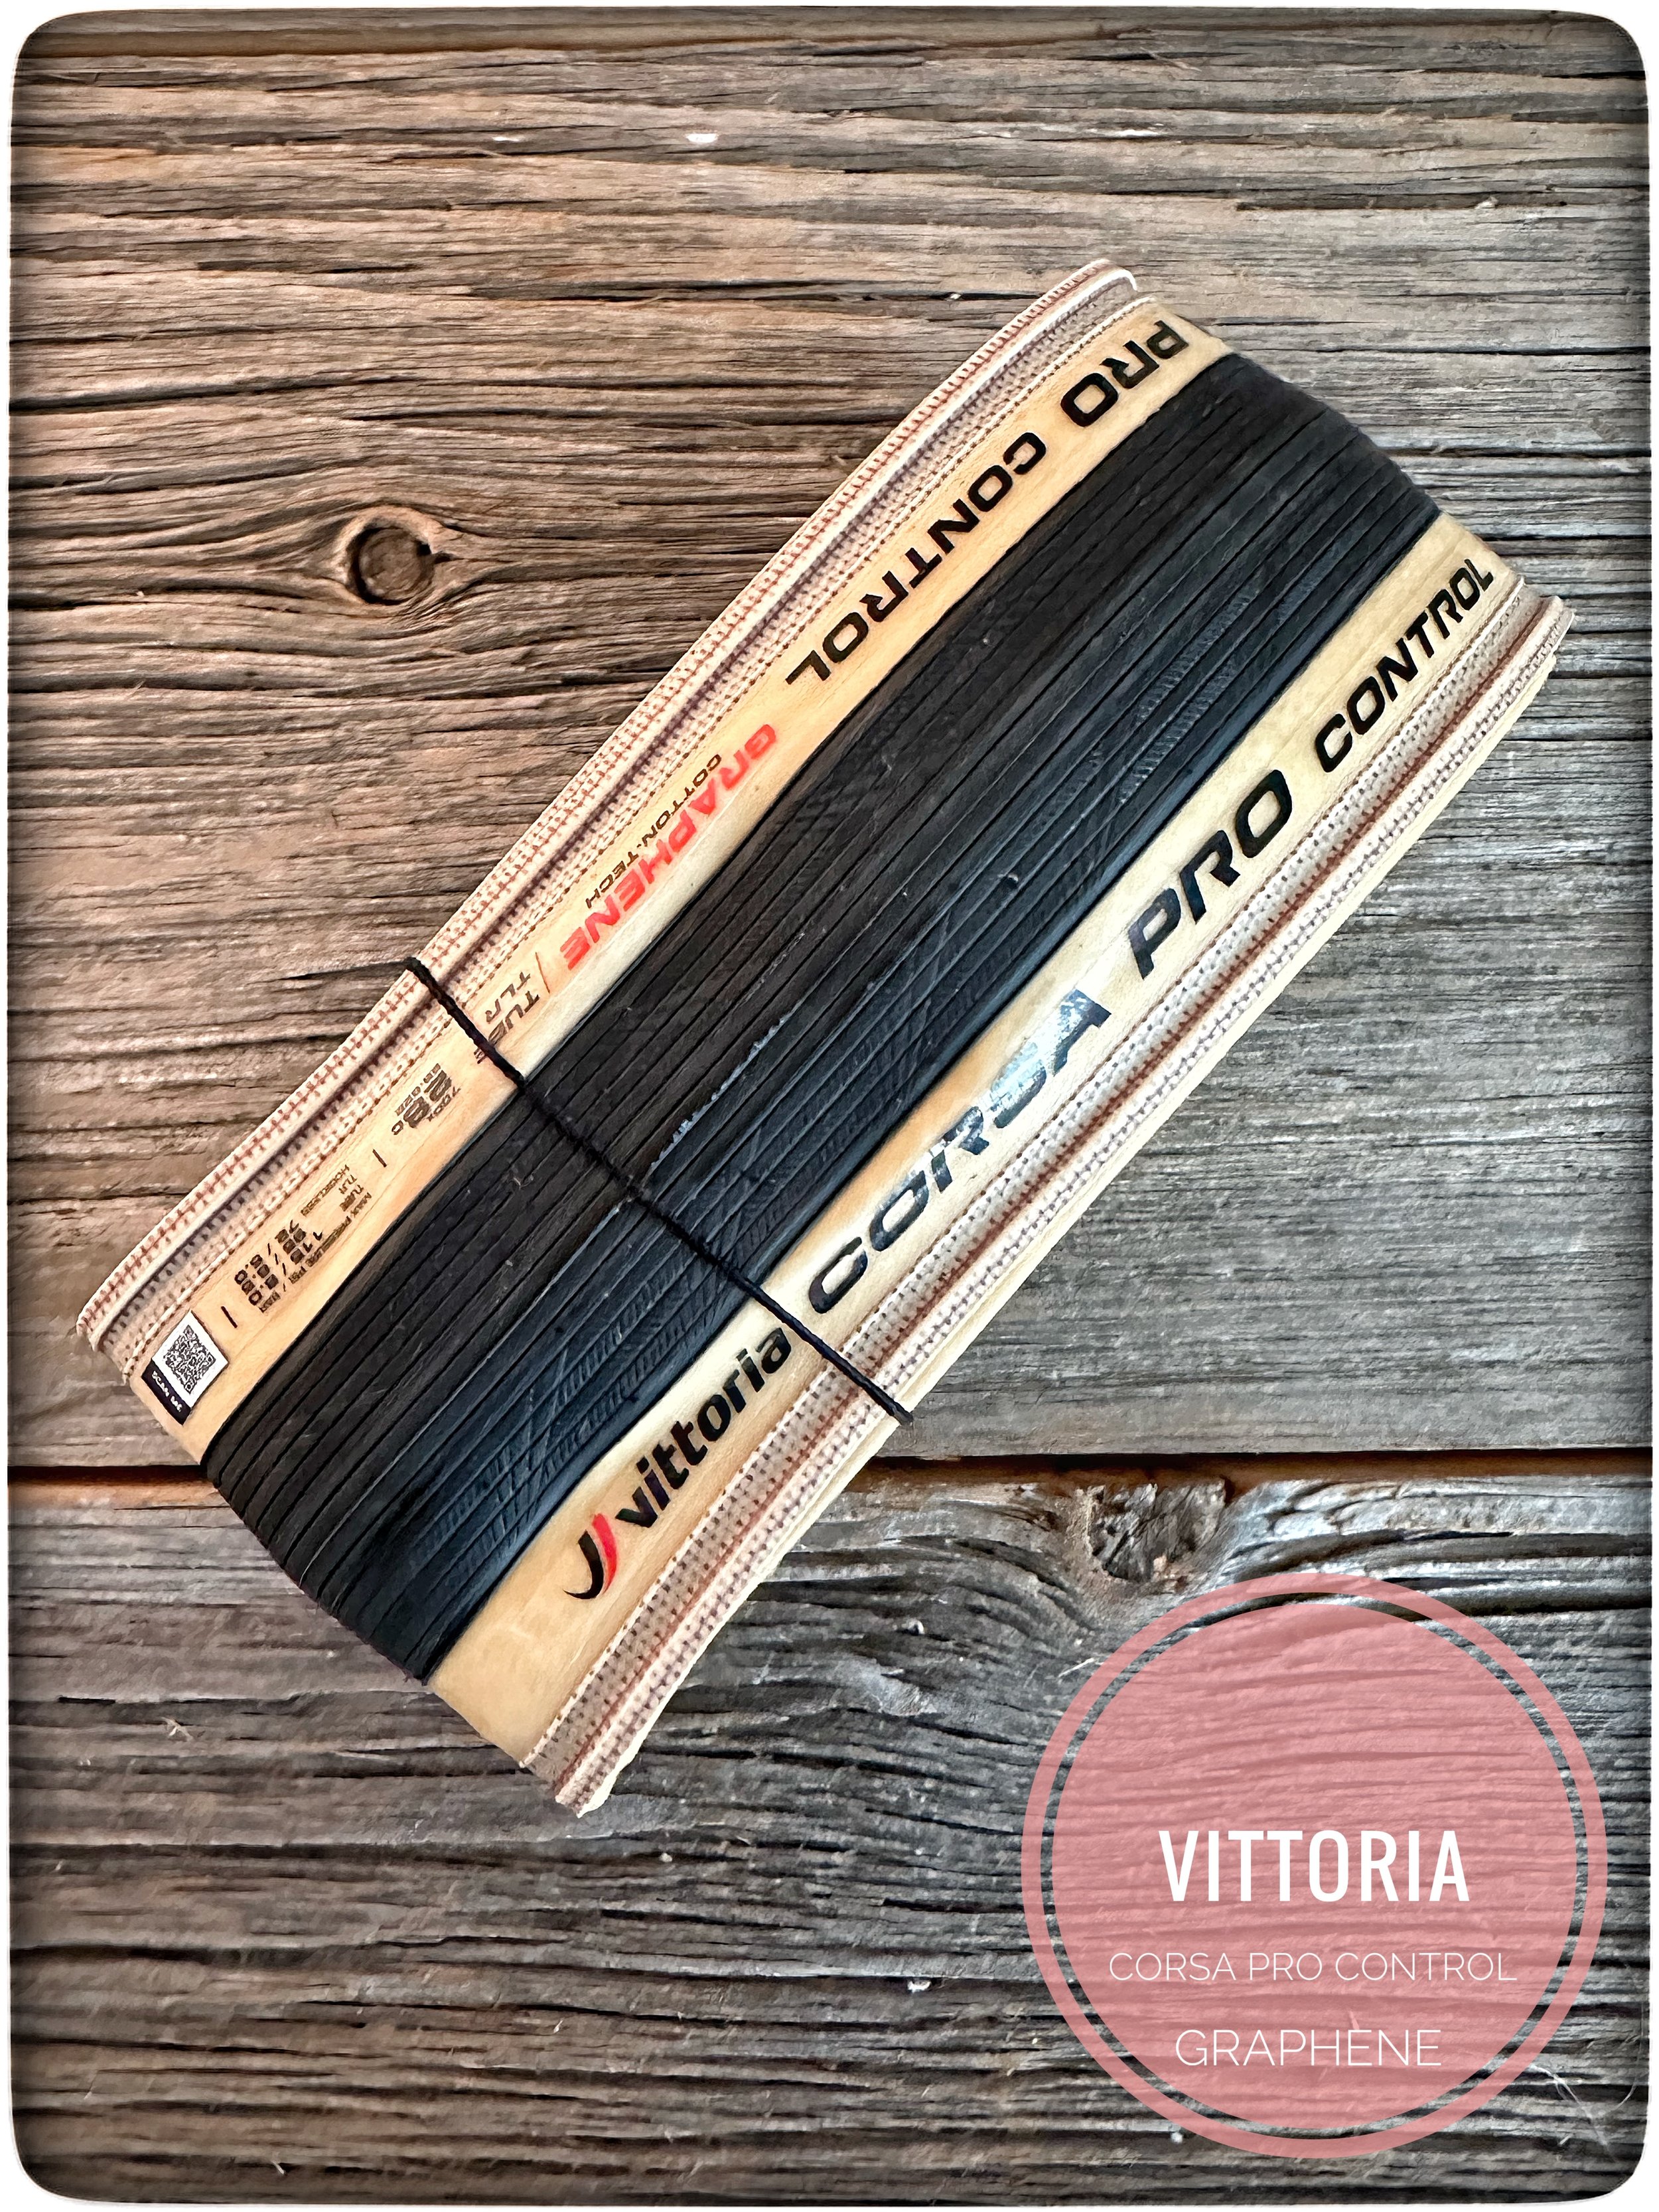
The way a tire is made and the materials used will dictate the “feel” of that tire on the road. For instance, a tire with a 350 tpi cotton side wall is likely going to require a higher pressure to give the tire a nice shape and a secure feel on the road. That’s the result of a very malleable and comfortable cotton side wall that doesn’t offer the same support as a more robust material like a kevlar or other similar materials.

On my road wheels I have fallen in love with the Vittoria Corsa Control 2.0 Graphene tires. They have that 350 tpi cotton side wall that I mentioned. I run them at 100psi and absolutely love the feel that it provides. I wouldn’t even consider running them at a lower pressure. As I said before, this decision is a personal one. It’s what works for me, not necessarily anyone else.

So, you’ll quickly come to realise that your psi decision will require some experimentation to dial it in perfectly. One man’s meat is another man’s poison as they say.

Just be careful not to drink the Koolaid of very low psi. Make absolutely certain that your psi choice doesn’t put your rims at risk of damage.

Eventually you’ll find an air pressure that just feels right. It’s much like your choice of saddle. The saddle that is perfect for my derriere may not be suitable for yours.

Buy yourself a good quality air pressure gauge if you feel the one built into your pump may be off.

Decide on a tire that ticks all the boxes for you. Don’t worry about what so and so is riding. Please yourself. Get to really know the attributes of that tire and what air pressure brings out it’s best qualities. Experiment.

It may take some trial and error but you’ll very likely end up with a specific front and rear tire air pressure that works best for you and your riding style. Keep a journal on how this affects the wear and lifespan of your tires.

Above all, enjoy the ride…

Different spokes for different folks..

Spokes. Whats the big deal? Aren’t they all the same? Why write an article on this? All valid questions that I will attempt to answer.

As a pro wheel builder I am daily custom cutting spokes to various lengths on my Morizumi spoke cutting and threading machine. I take meticulous measurements of every rim I plan to use, to determine the correct ERD ( effective rim diameter). Then I make equally exacting measurements of the hubs I will be using to determine the precise spoke length for those specific wheels. These numbers get plugged into very sophisticated online software that I couldn’t work without, and out spits the correct spoke length for those unique numbers.

Here’s what the formula looks like for such calculations.

Well before this I have already given some necessary thought to what type of spoke will be best for the wheels I am building. I might use a completely different model of spoke for the rear wheel than the front wheel. Taking advantages of the characteristics of each spoke model to help maximise the performance and ride quality of each wheel.

Over the decades I have used spokes from several well known and respected spoke manufacturers. Names like Robergel, Pym, Berg Union, Stella, Alpina, DT Swiss and Sapim.

Each of these companies made very high quality spokes that had slightly different characteristics. In the early days of building I predominately built with Robergel spokes from France, and to this day they are still my all time favourite spoke. They had some rare and very desirable properties that I have not found in any other spoke since. They were exceptionally light weight, yet had impressive strength and the ride quality was sublime. Many professional bike riders used them through out their careers and won many races on them.

In the late 1970’s I switched to DT Swiss spokes and I found them to be very consistent and of excellent quality yet I realised that they didn't quite have the magic of the Robergels that had become increasingly difficult to obtain. Nonetheless I was building excellent wheels with DT Swiss and they proved to be a very good choice.

For a long number of years I was predominately using the classic double butted spoke and it served the purpose just fine. Millions of wheels have been built with double butted spokes with no issues.

The next significant change in spoke design was the introduction of the bladed spoke. Aerodynamic considerations in bicycle design were really taken into consideration for each new improvement and spokes came under the same magnifying glass. Could they be improved to make us go faster? Apparently so! The birth of the bladed spoke heralded promises of improved aerodynamics and therefore greater speed. At first I admittedly was slow to embrace them. But after awhile I started to see how they could make for better and even stronger wheels with a speed bump as well.

Spokes like the Sapim CX Ray eventually became ubiquitous in the pro peloton and for good reason. They were incredibly light, incredibly strong and they were much faster than the double butted spokes they replaced. They also didn’t require any modifications of a standard hub spoke hole.

Being made of high quality 18/8 stainless steel meant they provided a great ride quality as well. This is more important than some might think. If you are a pro bike racer who regularly competes in road events longer than 250 klm’s you start to appreciate the importance of a degree of compliance and comfort in your wheels! Its not all about ultimate stiffness! It’s a delicate balance between speed, light weight, ride quality and a lively feeling when you are climbing and sprinting.

All these positive ride quality attributes will be felt in other cycling disciplines as well, like gravel riding and MTB riding.

The steel spoke has not gone without its challenges though. Many have tried to steal its crown! Carbon fibre spokes are getting a lot of attention right now and materials like ultra high molecular weight polyethylene are also being tested by curious cyclists who are looking for the next big thing.

At the moment I personally feel that the reign of the steel spoke will be with us for awhile. It has the right balance needed to provide all the things required for a great set of wheels no matter what your favourite cycling discipline happens to be.

One factor that doesn’t get much press is the issue of safety. A high quality stainless steel spoke will last a very long time, and they rarely ever break if the wheel was built at the correct tension and also has even tension.

In my many years of wheel building I have only had two spokes break! Considering how many decades we are talking about, that’s not too bad!

So, if we happen to get into a discussion about wheel design you’ll probably hear me extolling the virtues of those high quality bladed stainless spokes. I’ve built many wheels with spokes like the Sapim CX Ray and CX Sprint ( its slightly stouter brother) and they have a wonderful ride quality and I never worry about whether or not they will go the distance. They also seem to pair very well with carbon rims which bring their own unique ride characteristics to the table.

Steal is real as they say and I think its here to stay for a long time to come.

Sapim was founded by Herman Schoonhoven in 1918. They’ve been busy making great spokes for more than a century now.


Carbon Werx new Gravel Guru rims.

Our 25mm Gravel Head rim was a real revelation. Its incredibly light and has an amazing ride quality with the perfect amount of compliance on rough surfaces. I love it but I also wanted to offer a slightly deeper version.

This gave birth to the Gravel Guru which retains all of the notable features of the Gravel Head but with an additional 10mm of depth.

The Gravel Guru from Carbon Werx. Perfect for your gravel adventures and light enough to put you on the podium if racing is your thing.

So why bother with another gravel rim that in many ways is identical to the Gravel Head?

In two words it would be lateral stiffness. A deeper rim will create an increase in lateral stiffness which some riders may prefer and even need.

This will also suit riders who are a bit heavier. One can further fine tune the ride quality of a wheel built with this rim by hub choice, especially related to the size of the hub flange. Hubs like the White Industries XMR and Hadley have very large flanges and will provide a laterally stiffer wheel. Precious watts are not waisted in an overly flexible wheel when a large flange hub like those are used.

The lacing pattern will also influence the degree of lateral stiffness in a wheel. For instance a cross 3 lacing pattern will provide more lateral stiffness than say a cross 2 pattern.

This is all part of the process of a proper and optimised wheel design. I can alter all these parameters to suit the riders weight, cycling style, frame material, and geometry.

Rim depth plays a significant role in this area. So this is the reason for a similarly designed but deeper rim option.

The Gravel Guru is built with aerospace grade Toray T700 & T800 carbon fibre with an asymmetrically compensated spoke bed that shifts the spokes over by 2.5mm. Asymmetric rims are a clever idea that helps balance out the drive side and non drive side spoke tension. An essential move on light carbon disc wheels.

The external rim dimensions are 29mm and the internal width is 22.5mm. Ideally suited for typical gravel tires.

The weight is 415 grams for the rear rim, which is ideal, and the option of a lighter front rim at 355 grams. Available in several spoke counts, though I would highly recommend a 28 spoke wheel for the strength and support needed for worry free gravel riding or racing.

I have built the Gravel Guru with Sapim CX Sprint bladed spokes to great effect. They are plenty light and plenty strong with a small aerodynamic advantage as well.

The Gravel Guru in a 3K external weave and glossy finish. Paired with some DT Swiss 350 hubs for an ideal set of gravel wheels.

So now you have your choice of either a 25mm or a 35mm Carbon Werx gravel rim made of the finest Toray carbon fibre and with several aesthetic options such as a choice of external carbon weaves and a matte or glossy finish, in the spoke count of your choice.

Both rims are priced identically at $579.00 and have an approximate manufacturing time of 4 weeks.

For a complete custom wheel build there are numerous hub options from such esteemed USA makers as Chris King, Hadley, Project 321, Onyx, White Industries and Industry 9.

Give me a call if a custom set of gravel wheels are on your bucket list of must haves. I’d be happy to work out a wheel design that suits you. Our Carbon Werx rims will easily go head to head with virtually any other gravel rim on the market today. In my honest opinion I think we have the best gravel rim to be had, anywhere.

The DT Swiss 350 hub

The venerable 350 has been around for awhile now and it needs no introduction, yet a few words of praise are worth penning. Normally if I take the time to write a piece for my blog it would probably be about something special or maybe a bit exotic. Something for you to get really excited about.

Now I don’t think you’ll party for a week after reading about the virtues of the Taiwanese made lowly brother of the DT Swiss 240, but it still needs to be on your radar even if that’s a revelation.

Why? Well, where do I start?

When you’re contemplating a new custom set of wheels you are probably dreaming of buying the most expensive hubs that you can afford, and that’s not a bad approach because you’re hoping to get many years of use out of said dream wheels. This much I understand. But there are times when you might need that second set of wheels but the bank account is looking a little compromised. What to do? Where can I save some dough on that new set of gravel wheels that I wasn’t planning on telling the wife/hubby about.

In steps the DT Swiss 350 all dressed in black looking pretty fabulous. Now this is looking doable you say to yourself.

A thru axle version with a centrelock disc brake interface that ships with an adaptor for an ISO 6 blot disc rotor if needed.

A thru axle version with a centrelock disc brake interface that ships with an adaptor for an ISO 6 blot disc rotor if needed.

So why is the 350 worthy of my attention as opposed to other budget hub options?

Let me explain.

Over the years the 350 has benefited from the gradual changes in its older brother the 240. As the 240 grew there was a trickle down effect to improve the 350.

The 240 is a wonderful hub that’s proven itself time and again in everything from the Tour de France to a 1000 other important races around the globe. Its a hub that just works perfectly, never lets you down and looks great in basic black.

On the other hand the 350 is not a world away from the more expensive and fabled 240.

The 350 is also available in several models and axle configurations. Both 6 bolt and centrelock disc brake interfaces are on offer and a standard road model for rim brakes is there as well. The centrelock version also ships with an adaptor that enables you to use a 6 bolt disc rotor if that’s what you have on hand. Now that’s clever!

This hub has models available for standard J-bend spokes or for straight pull, so suit yourself!

The 350 is also available in a disc version for straight pull spokes.

The 350 is also available in a disc version for straight pull spokes.

I must comment on the bearing quality. I am always amazed at the perfect buttery smooth spin that happens after I’ve completed a wheel with 350’s.

And those bearings stay that way for quite a long time if you look after them. Avoid silly maintenance moves like power washing your bike which invariably pushes water and silt straight into your bearings leading to premature wear.

The finish on these hubs is always this side of flawless. I have never seen one that had a flaw. Get out your magnifying glass and try to find one. You won’t!

The CNC workmanship on these hubs can’t be faulted either. In fact I will go on record and say that they are in no way inferior to the pricier 240.

In a nutshell you can’t go wrong with this lovely hub. No, it doesn’t give you the bragging rights that come with a set of custom Royce hubs with a gold nitride finish, but not everybody has that kind of money to spend on super fancy hubs. Nor will they outshine that set of solid titanium Gokiso hubs that will make you $10K poorer.

But you will be on a superb set of hubs that will go the distance and then some, be it for your road, gravel, cyclocross or MTB machine.

Truth be told, you could ride any event in the world on these and they wouldn’t stop you from being the top man on the podium. You just need the legs.

Cognoscenti Cycles always try to keep a few pairs in stock for the savvy buyer.

So, if your objective is to save a few dollars and still get a killer set of hand built wheels then take a long look at the 350’s. You’d be hard pressed to find any hub in this price range that ticks as many boxes as this one.

The latest addition to the 350 hubset gives us a new decal and a black matte finish instead of the glossy black on the DT Swiss Classic 350. Also the rear hub has a new shape for the hub shell and a subtle change in the end caps with the flared tips to enable an easier removal.

Mèti Titanium thru Axles from Italy

Titanium. The very word conjures up notions of the finest bicycle components available. Light, durable, and all the special attributes of a metal with almost magical properties.

My first brush with exotic titanium components was in the early 1970’s when a small company out of Palo Alto California began offering special hand made bolt kits made of titanium.

Every racing cyclist I knew ate that up like candy! They were available in small quantities and replaced your otherwise heavy steel fastening bolts with 6AI-4V titanium.

This was the birth of titanium after market bicycle parts.

I believe these ti bolt kits actually inspired Campagnolo to start offering them on their new line of Super Record groupos in 1973.

So, what’s happening today in the world of titanium components? Well, something special is coming out of Italy and that’s the work of Dante Codeluppi who is the brains behind Mèti.

Titanium 6AI-4V thru axles, custom made in Italy to your specifications by Dante Codeluppi of Mèti.

Titanium 6AI-4V thru axles, custom made in Italy to your specifications by Dante Codeluppi of Mèti.


Dante is manufacturing light weight titanium 6AI-4V thru axles that are just beautiful. I spent the last few weeks on holiday riding gravel in northern Ontario and I took the opportunity to test out these works of art.

I had Dante custom make me a pair of thru axles that precisely fitted my frame and fork dimensions.

I always insist in personally testing a new product before I would consider offering it to my clientele.

Well, what was the verdict? My initial thoughts went to just how light these are, weighing in at 32 grams for the front and 42 grams for the rear was impressive to say the least.

The artfully sculpted domed end has 3 finely cut wrench flats and an allan key size of 6mm.

The actual finish was just like jewellery! Polished to a mirror finish and made to exacting standards. Dante’s workmanship was impressive. His use of Grade 5 titanium or 6AI-4V as its known, ensures that these parts will last a very long time.

Each set of these titanium thru axles are custom made, because they must accurately match the thread pitch and the length of the thru axles they will replace. Careful measurements of your existing thru axles will need to be made to assure that the new ones will be a correct fit.

If you are riding a titanium frame and you just can’t resist some more titanium bling on your bike these are a definite temptation. Having said that, they will work perfectly on any frame material and they look just fantastic.

Delivery times for a custom order is approximately 5 weeks depending on when that order goes in. Shipping is by DHL so that’s fairly quick from Italy.

If you have any questions, just get in touch and I’d be happy to answer any of your queries.

Cognoscenti Cycles is excited to be able to offer a very special custom product like this.

Carbon Werx

Carbon Werx is a long awaited project that Cognoscenti Cycles has been working on for the last 3 years. It was my desire to bring to market excellent quality carbon rims for all cycling disciplines at affordable prices. It was a matter of finding whom to partner with that could provide great quality control with cutting edge design at a reasonable cost. Not an easy task!

I began my search among the best Asian carbon rim manufacturers. Asia now produces some of the absolute best carbon rims that money can buy. This area of the cycling industry is no longer dominated by USA or European carbon rim makers.

Both Chinese and Taiwanese rim makers are turning out the largest number of carbon rims annually in the world. They have refined their processes and created new ones that now leads the way.

This has enabled the birth of Carbon Werx, which uses the finest aerospace grade Japanese Toray T700 and T800 carbon fibre, producing rims of enviable quality. I have partnered with a few companies that will make every rim model I need, which is a substantial number.

I made certain that each cycling discipline would have rims with cutting edge design and superb execution.

Cognoscenti Cycles caters to road riders, MTB riders, gravel grinders, touring cyclists, track cyclists and almost every other riding style one could imagine.

This demands quite a number of rim options! I can confidently say we have all the bases covered.

At the moment I am dreaming up some decal designs. That might take awhile but I want to get it right. It’s the last part of this rather large puzzle but an important one!

In the end I will have something that proudly displays our new rim company, Carbon Werx.

Each and every wheel will still be hand built by me, using the tried and true methods that have sustained our reputation since day one. Over the last year I have built numerous custom built wheels with our Carbon Werx rims and my clients feedback is all very positive.

If this sounds like it might satisfy your need for an excellent set of carbon wheels at an affordable price then give me a call and we’ll discuss all the various options that are available. Numerous rims depths and widths are available in both hooked and hookless designs as well as surface finishes like UD and 3K carbon weaves in matte or glossy. All spokes counts will also be procurable.

Prices start at $549.00 and go up to $599.00 depending on the model, the rim depth and other features.

Our 55mm road rim with internal spoke nipples for a stealthy look and an aerodynamic advantage. Available in ether matt or glossy finish and several exterior carbon weaves to suit your preference.

Our 55mm road rim with internal spoke nipples for a stealthy look and an aerodynamic advantage. Available in ether matt or glossy finish and several exterior carbon weaves to suit your preference.

Build Quality

What exactly should you be expecting for the build quality associated with custom built wheels? Don’t all hand built wheels have an exceptional build quality?

In all honesty they certainly should be built to the highest standards, but unfortunately that’s not always the case.

Let me explain.

Anyone can claim to be a professional wheel builder and they might have a website and a business card but what does that guarantee? One would hope that they would be able to offer wheels built to the highest standards, but that’s simply not always the case.

So how does one know if the person that you are thinking of hiring is in fact a knowledgeable and experienced builder worthy of your hard earned money and trust.

You would do yourself a favour by asking a number of questions to that wheel builder.

Questions like, “do you build wheels for a living” and is this your sole source of income?

“How many years have you been building wheels as your sole source of income?

If for instance you are planning on getting a set of carbon wheels you might ask how extensive their experience is with carbon rims as an example.

If you are getting custom wheels built for a specific cycling discipline you might ask the wheel builder how much experience he/she has building wheels for that cycling discipline. Are they conversant with road wheels, gravel wheels, MTB wheels, touring wheels? etc…

You also might enquire about whether or not they have genuine relationships with the suppliers and distributors of the companies they purport to sell. Can they prove that?

This will effect what kind of warranty they can offer should any of those products you buy turn out to be defective.

Lastly you can ask about what tools they own. These days a professional wheel builder should be in possession of some pretty sophisticated tools. If they lack these tools that’s an immediate red flag. Tools don’t replace experience but they do facilitate a proper job. Wheels can’t be built to the highest standards without those tools. It’s just that simple.

Cognoscenti Cycles is always adding new tools to our already impressive arsenal of specialised wheel building tools.

These are a few of the things you can ask a prospective wheel builder to see if they are really up to the task. Its not just a matter of getting a good deal on the price of the components that will make up your finished wheel set. If the build quality is suspect that can even invite safety issues. I wouldn’t want to be hurtling down a hill on my new MTB wheels only to find out that they weren’t built at an optimum spoke tension which resulted in a catastrophic failure and a terrible accident. That thought is quite sobering.

All of this advice can be applied to large companies as well as small sole proprietor owned business’s. Huge name-brand companies also are guilty of pumping out sub standard wheel builds everyday of the week. I won’t name any names for fear of some sort of legal reprisal but trust me when I tell you that I work on wheels built by the biggest names in the business all the time and I am never shocked to see just how bad, bad can get. So just because a company is large, been around for decades or promises a super fine build means absolutely nothing. People have to take pride in their work and care about what they are doing, and shouldn’t be working under strict time quota’s that seriously compromise quality.

Seek out your local pro wheel builder who is truly a specialist.

I hope this helps in seeing the sound reasons for vetting your wheel builder. Find the person with the greatest amount of experience possible. It will serve you well.

I take spoke tension very seriously and therefore Cognoscenti Cycles has developed its own highly accurate spoke tension meter. We feel this is the most accurate meter currently available.

I take spoke tension very seriously and therefore Cognoscenti Cycles has developed its own highly accurate spoke tension meter. We feel this is the most accurate meter currently available.

Hub Maintenance

I think it’s important to know just how to get the most out of the life of your hubs, especially if you’ve just taken possession of a new set of custom wheels from Cognoscenti Cycles.

Even the highest quality hubs need some special care and shouldn’t be ignored. Regularly checking your bearings for the development of any unwanted play or a feeling of grittiness is essential to their lifespan.

Also, if a hub design incorporates a pre-load adjustment system for the bearings you’ll need to make sure that the bearings haven’t developed any play. Riding your wheels with loose bearings will do immediate damage to them and possibly to your hub shell.

For instance Chris King hubs have a unique pre-load adjustment on the non drive side that helps to remove any unwanted bearing play quite easily. Chris King recommends a pre-load adjustment within the first 200 klms of use. If you ignore this you could possibly be doing damage to your hub.

The Chris King R45D hub with an axle based pre-load adjustment system.

The Chris King R45D hub with an axle based pre-load adjustment system.

Hadley hubs from California have a nice pre-load adjustment system that’s built right into the hub shell instead of on the axle like Chris King.

Hadleys pre-load adjustment is unique to their lovely hubs and requires special tools.

Hadleys pre-load adjustment is unique to their lovely hubs and requires special tools.

If your hub design has no pre-load system there is no real reason to be overly concerned. Some of the best hubs in the world don’t use any pre-load adjustment whatsoever. Why? Classic hubs like the DT Swiss 240 don’t have a pre-load adjustment. Instead DT Swiss meticulously drill the bearing bore in the hub shell to extremely fine tolerances. This means that the hub starts life with brand new bearings fitted into ultra tight bearing bores that guarantee no initial play. Over time these bearings will normally wear and loose their buttery smooth feel. When that time comes its time to replace your bearings with new ones. Well known hubs like Hope and White Industries also design their hubs with no pre-load adjustment.

White Industries superb XMR hubs are designed without an adjustable pre-load mechanism.

White Industries superb XMR hubs are designed without an adjustable pre-load mechanism.

All bearings eventually were out and require replacement so this is normal. Bearing life is dependent on their quality and the type of cycling you do. Hard riding like MTB and gravel grinding tend to wear bearings out much faster than say road riding. Cycling in foul weather will also kill your bearings faster than almost anything else.

One should consider how much pressure is being loaded onto your bearings when clamping your wheel into your drop outs. Whether you are using a standard quick release or some type of thru axle skewer, you should be aware of how much force is being applied to your hub and its bearings. An excess of force will add a considerable amount of unwanted pressure on your bearings which will overload them and cause premature wear.

What about the freehub? There are several different approaches to freehub design and this effects the freehubs life span as well as its need for eventual maintenance. Most are built on a system of pawls that engage when we pedal. Often those pawls are actuated by small steel springs that may require replacement from time to time. Pawls also eventually wear out and need to be replaced.

Some freehub designs are free of pawls altogether like the DT Swiss Star Ratchet system as well as the freehub by Onyx Racing Products and Chris King as well as Trailmech MTB hubs. Freehubs also have internal sealed bearings that will eventually loose tolerance and require replacement.

If your freehub is alloy you should keep an eye out for what we call “cog bite”. This is the wear from your cassette cogs eventually digging into your alloy freehub body and wearing it out. After a few seasons of hard riding you might be a candidate for a new freehub. If your freehub is made from steel or titanium these can last considerably longer before requiring a replacement.

Whatever the design, you will have to ensure that they remain lubricated. If things dry out in your hub it may cease to work at all. Special lubricants are sometimes essential to the smooth running of your hubs. Its not wise to put just any old grease into your hub. Onyx requires a special grease from Kluber in Germany and Chris King has their own line of greases and other lubricants for their hubs.

You’ll need a qualified mechanic to work on your hubs. I wouldn’t trust that to just anyone, as their approach may ruin your hubs. I have heard horror stories of some mechanics who lack the right tools or the knowledge to perform a proper overhaul and destroy someones’s hub.

There are a number of essential tools for hub overhaul. Chris King have designed very special tools to disassemble their hubs. Attempting to disassemble one of their hubs without these tools will likely damage it.

Bearing removal tools are absolutely essential to the correct method of replacing worn bearings. I have seen some unlearned mechanics remove them with a hammer and a punch and destroy that carefully drilled bearing bore, completely eliminating the fine tolerances that your hub initially had.

Special bearing presses are absolutely necessary for replacing worn bearings.

Special bearing presses are absolutely necessary for replacing worn bearings.

Cleaning your hubs must be done in a particular way as well. In this era of high pressure hoses and power washing devices its tempting to wash your bike at the local car wash or use some sort of pressure washing system. Even washing your bike in your shower is a sure fire way to kill your bearings. So AVOID any high pressure washing system. Yes, its convenient but you will potentially kill your hub bearings. All washing must be done with just a damp rag being careful not to allow any water or cleaners or de-greasers near your bearings.

This is admittedly a time consuming process, but it insures that no water is pushed into your bearings.

If your hubs start to sound noisy or are making unfamiliar sounds then they should be looked at right away. Don’t wait as this may bring about an early hub death that won’t be covered by warranty. Hub manufacturers fully expect you to preform regular maintenance so don’t expect them to provide you with a new hub for free if you didn’t look after it.

This short article is hardly an exhaustive treatise on all aspects of hub maintenance so If you have any questions don’t hesitate to reach out to get those questions answered.

If you look after your hubs they should last for many many seasons, but they will need regular maintenance, so keep that in mind.

The Gravel Head

With the advent of pro gravel racing the desire for the lightest wheels possible arises. Companies like Enve have attempted to answer the call with their new G23 gravel rims. They’re super light, weighing in at approximately 335 grams. A daring and bold move to produce a sub 400 gram rim that will stand up to the punishment of races like Dirty Kanza and similar events.

I’ve built several sets of wheels with these rims and I felt that they lacked a few things and could certainly be improved upon. So our house brand of rims Carbon Werx took up the challenge to make a better rim with a few key features that are definite improvements.

Simply put, our goal was an improved version of the G23. We started with the material composition of the rim itself and spared no expense to have it built with best quality Japanese Toray T700 and T800 carbon fibre. This aerospace grade material leaves nothing to be desired. It’s the best carbon fibre currently available and produces the absolute finest quality rims. No contest!

This gave us a finished weight of about 345 grams. Very close to the G23 and a weight that I thought was as low as I wanted to go. The combination of T700 & T800 carbon fibre provides a perfect blend of strength, light weight and necessary compliance. All attributes of a gravel wheel for the serious racer.

I felt that a 25mm deep rim was quite suitable so we stuck with that dimension. It’s worth mentioning that a 25mm deep carbon rim has been used successfully for years within the MTB community for sound reasons. That shallow depth builds up to a very compliant wheel which is necessary for traversing bumpy and difficult terrain.

We opted for a 23.5mm internal width and a 30mm external width. This enables the use of tires from 32mm all the way up to 45mm wide.

The next feature was a no brainer and that was a rim that had an asymmetric compensation. This design feature has been used by numerous rim designers and is nothing new but what a great idea! It shifts the spoke bed over by almost 3mm and helps to equalise none drive and drive side spoke tension. On a rear wheel it makes an enormous difference in improving the disparity in uneven spoke tension therefore strengthening the wheel. It does much the same thing on a front disc wheel as well.

Lastly was the spoke count. Enve only offers a 24 hole version which is quite limiting. It’s naive to think that only 24 holes is sufficient for riders above 160 pounds. Heavier riders will not have enough spokes to provide the proper support needed over rough terrain resulting in a potentially soft and unfocused feel on the road.

So we opted for a much more sensible 28 hole configuration. With the use of extremely light spokes like the Sapim CX Ray or CX Sprint a few additional spokes adds next to nothing to a wheels overall weight yet works to provide much needed additional lateral strength and stiffness. It’s very noticeable when riding a 28 spoke wheel over a tough gravel road as it provides a very lively and dynamic feel. I do a lot of gravel riding and have personally tested these things to arrive at the best possible set up.

A custom build with the Gravel Heads with a 3K exterior weave in glossy finish paired up with Hadley hubs from California.

A custom build with the Gravel Heads with a 3K exterior weave in glossy finish paired up with Hadley hubs from California.

So what if you weigh 150 pounds and you’d really like to push the envelope with a pair of 24 hole gravel wheels. No problem! All our rims are custom ordered so we’d be happy to build a pair of 24 hole wheels for you if you insist.

We can also offer different spoke counts that utilise a 28 hole rear wheel and a 24 hole front wheel. This is the value of having custom built wheels. There are numerous options! No need to put up with the limitations of off the rack generic builds. Go custom and get what you actually want.

I also recommend mixed spoke models. I often employ the use of Sapim’s CX Sprints for the rear wheel and Sapim CX Rays for the front wheel to fine tune both comfort and speed..

Both are forged Sandvik steel bladed spokes but they have very slightly different dimensions almost imperceivable to the naked eye. The CX Sprint is a bit more robust and therefore is suitable for the rear wheel, providing some improved stiffness and strength. The CX Ray is lighter and works perfectly up front.

This blend creates a very nice ride quality. Ample strength in the rear wheel which supports almost 70% of the riders weight and a tad more compliant up front to give your hands and upper body less of a beating after a long day in the saddle over tough gravel terrain.

The ultimate set of race day gravel wheels sporting Vittoria Terreno Dry tires for low rolling resistance and superb grip.

The ultimate set of race day gravel wheels sporting Vittoria Terreno Dry tires for low rolling resistance and superb grip.

I also felt it was important to have a conventional external spoke nipple instead of an internal nipple. Why? An internal nipple does add a tiny aerodynamic benefit but this is outweighed by the problem of having to true a wheel or actually replace a spoke. Imagine if you took a tumble in a gravel event and you needed to true your wheel to keep going. If you had an external nipple it would be dead easy. If you had an internal nipple it would be a nightmare. You’d have to remove the tire, then take off the rim tape, true the wheel, retape the rim and remount the tire. This would take a long time even for a seasoned mechanic and if you had a tubeless set up you’d have tire sealant all over your hands. So for ease of a quick and painless repair an external nipple makes much more sense to me. Therefore our new Gravel Head rim sports external nipples.

In summary I feel that the new Carbon Werx gravel rim ticks all the boxes and gives gravel riders a better rim at a much more attractive price as well.

If you want a very light pair of gravel wheels for a competitive edge, just contact me and we’ll begin the process of a custom build suited to your weight and cycling style.

The new Gravel Head from Carbon Werx. An ultra light 345 gram asymmetric carbon rim made from finest Toray T700 & T800 carbon fibre.

The new Gravel Head from Carbon Werx. An ultra light 345 gram asymmetric carbon rim made from finest Toray T700 & T800 carbon fibre.

The Tire Kickers

It’s 2021 and this year will bring some welcome changes. Fortunately or unfortunately, Cognoscenti Cycles has become somewhat of a victim of its own success. As much as I love discussing all the fine details of gorgeous hand built wheels with my clients, things are about to evolve. I have decided it’s time to introduce a new policy regarding providing valuable technical information and detailed quotes for potential clients.

I am always very happy to hear from anyone who decides they can improve their ride with a new custom set of wheels. Because its the single most important change that any cyclist can make to their bike to enhance both ride quality, overall performance and comfort.

Daily I get a healthy number of calls, texts and emails from people looking to get schooled on what defines an excellent set of wheels. These conversations can literally last for hours as my brain gets picked clean of years worth of wheel building experience.

Some of these people are just seeking good advice and others lead me to believe that they have every intention of ordering a custom set of wheels. All this can take quite a bit of time and there are entire days that go by were I don’t even get the chance to work in my shop because I am answering lengthy technical emails or chatting on the phone.

So, this has brought about a change in how I will be doing business from here on in.

This is how it will work henceforth. To initiate a conversation on ordering a pair of wheels from Cognoscenti Cycles a fee of $100.00 will be charged before the discussion begins.

This fee is essentially paying me for the time it takes to create a personalised wheel design. This does not entitle one to endless emails and phone calls to arrive at a suitable design. A total of 4 detailed emails is generally sufficient to determine what components are needed for a set of custom wheels. If a prospective client does end up ordering a set of wheels, that $100.00 design fee will be deducted from the final quote.

If the client decides he does not want to place an order for those wheels now, he walks away with a Cognoscenti Cycles wheel design that he can revisit in the future, or take that information and use it to purchase elsewhere. This $100.00 fee could potentially save you hundreds or even thousands of dollars purchasing the wrong wheels or components from unscrupulous business’s who routinely oversell unwary customers.

And my time will be compensated for and the client receives valuable technical information and sound advice that he can use whenever he decides to purchase new wheels.

Payment shall be made by E-Interac to corey@cognoscenti-cycles.com

I trust you understand why this policy was introduced. This world is full of tire kickers, and though we love to chat to all cycling enthusiasts, Cognoscenti Cycles has become too busy to entertain them.

This change will enable Cognoscenti Cycles to continue hand building the absolute best wheels available for discerning customers who appreciate and demand that level of unparalleled quality.

The finest hand built wheels since 1973.

The finest hand built wheels since 1973.

Synthesis XCT from Crankbrothers

Crankbrothers have a new line of rims with the curious name of Synthesis. After examining these rims I came to the conclusion that they were aptly named. Here are a few synonyms for the word synthesis. Union, amalgam, blend, mixture, compound, fusion, coalescence, composite, concoction, conglomerate and alloy.

Keep these in mind as we begin to explore the attributes of these rims to see if the name suits.

When I unboxed these lovely rims I immediately thought of an obvious comparison that stood out . There are slightly raised hubs at every spoke hole exit point that are quite similar to those found on the Reserve rims by Santa Cruz. But the approach with the Synthesis is far more subtle and refined.

I have built the Reserve rims and I feel that they are too stiff, so the approach by Crankbrothers here is superior.

The next thing that struck me right out of the gate was the weight. I didn’t need my trusty scale to know I was holding a very light rim. Curiosity got the better of me and I pulled out the scale to see just how light they really were. The front was 370 grams and the rear was 379 grams.

Synthesis XCT 29er’s primed and ready for some tires!

Synthesis XCT 29er’s primed and ready for some tires!

If you are familiar with carbon rim designs you would acknowledge that’s quite light, especially for anything that will be required to survive on the trail! The specs on the rims are as follows. Front: 31.1mm wide - 26.5mm internal Rear: 29.5mm wide - 24.5mm internal with a 19mm depth.

Right off the bat you’ll notice that there are some intentional dimensional differences between the front and rear rims. Each rim has been designed to excel at its assigned task. The role that a front rim plays is very different than the role of a rear so why should they be identical.

The front rim with its wider internal dimension was designed with a slightly wider tire in mind and the rear with a potentially narrower tire.

I chose a pair of 29er’s with a 32 hole rear and a 28 hole front to see if I could build up a very light pair of MTB wheels that would still hold up to a proper thrashing in the outbacks!

My choice for the ultimate hubset was Hadley. These beautiful Californian hubs have nice big flanges that will help to keep things both stiff and strong. You really need to have a pair sitting in hand to see just how well made they are. I also had an all gold colour theme in mind, so gold anodised hubs were the order of the day.


Flawless CNC workmanship and  gorgeous gold anodisation.

Flawless CNC workmanship and gorgeous gold anodisation.

The Synthesis XCT carbon rims could hardly find a more suitable match than these stunning Hadley hubs!

The Synthesis XCT carbon rims could hardly find a more suitable match than these stunning Hadley hubs!


Gold Hadleys, gold Sapim double square 3.2mm alloy nipples and gold titanium tubeless valves from the guys at Lindarets. You’d think their destination was Fort Knox!

I thought I would opt for some bladed spokes for this build and Sapim’s CX Sprints were a great choice. I have used them extensively for many gravel wheels to good success and I felt they would do the trick nicely with the Synthesis XCT/ Hadley combination.

They are a little bit more stout than the ultralight CX Rays and that extra metal will go a long way in providing some additional lateral strength for these wheels. A tried and true cross 3 lacing pattern was the obvious choice as well. If it ain’t broke, don’t fix it.

I decided that there was no real need for spoke nipple washers. Normally I am a big fan of the stainless steel HM washers from Sapim. They are immensely helpful at staving off rim cracks and providing some extra support for rims with thin spoke beds. In this case the Synthesis had a generously thick spoke bed which removed any concern about a potential crack in the rim.

So, how did these uber light rims react when being brought up to a final tension of over 100 kgf?

In a word, impressive! You have to work carefully when building with carbon rims that are under 400 grams. So I take my time and very gradually increase the overall tension while working through the build. This gives me the chance to monitor how the rim is responding with successive increases of tension. The Synthesis responded wonderfully as the tension climbed, showing no signs of “carbon fatigue” as I like to call it. This bodes well for the lifespan of a rim which reminds me of the fact that these rims come with a lifetime warranty to the original owner. A very rare offer in the world of carbon rims, highlighting the confidence that Crankbrothers obviously have in this product.

Even at the finished tension of 105 kgf for the front and 110kgf in the rear they were holding their own perfectly. The final de-stressing step was a very positive indicator of this rims intrinsic strength. When they went back into the truing stand they were still dead true, requiring no additional work to bring them back into shape. That’s quite impressive and is a testimony to the rim designers abilities and those who determine the specific carbon layup at the factory. Very few rims attain this ideal marriage of design and build quality.

Some might be curious about the respective weights of each wheel. The front tipped the scales at 739 grams without a tire and similarly the rear was 910 grams. So, 1649 grams for the pair.

I always learn a ton about a rims potential just from building it up, but the real acid test of course will be some miles on the trails. You’ll have to wait for the next instalment that delves into the ride quality of these beautiful rims. Stay tuned!

If you would like to discuss a set of custom wheels with Crankbrothers new Synthesis rims just give me a call. You have numerous excellent hub options at your disposal. My favourite MTB hubs are from several distinguished makers like Onyx, Chris King, White Industries, Industry 9, Trailmech, Hope and Hadley of course.

Hadley are arguably one of the finest MTB hubs currently being made. Incredible quality replete with a titanium freehub.

Hadley are arguably one of the finest MTB hubs currently being made. Incredible quality replete with a titanium freehub.

Venn VAR77 Filament Wound Carbon Rims

The Venn VAR77 rim is truly unique in the world of carbon rims for a number of noteworthy reasons. I built up my first pair recently for a client who wanted some special track wheels for a road fixie project he was bringing to life. We decided on a perennial classic track hub by Phil Wood. A very good choice. The front and rear wheel would be suspended by 24 CX Ray bladed spokes in a cross 2 symmetrical lacing pattern.

Cognoscenti Cycles website0069Phil Wood.jpg

The Venn VAR77 carbon rim was chosen for its extreme depth and its aero profile, though it had a few other attributes that put it in a class of its own that we’ll look at here.

It has the distinction of being the first carbon rim in the world to have utilised AI or artificial intelligence to help determine its aero profile design. Very cool!

77mm deep!

77mm deep!

That rim was subjected to an independent test and found to be the fastest for that particular depth in existence. Proving beyond the shadow of a doubt that an AI influenced design could rise to the occasion and succeed.

Here’s a table showing  how the VAR77  performs against some other rims from Venn.

Here’s a table showing how the VAR77 performs against some other rims from Venn.

But as amazing as that is, it’s not the whole story behind the VAR77. It also has a construction methodology that is completely unique for a carbon rim and that’s a filament wound method instead of a standard carbon hand layup that every other rim in the world utilises. Filament winding is not that new in of itself, but only recently has this technique been employed in manufacturing carbon bicycle rims.

The end result of this method of rim construction is a very refined and accurate computer controlled process that raises the bar for carbon rim quality.

I noticed this new level of quality when building these wheels. Both sides of the rim were absolutely flat which is often not the case on a carbon rim that is made with a traditional hand layup. I also saw that the rim was rounder than you would see with a regular carbon rim. This greater degree of accuracy in this area enabled me to get this wheel perfectly round. Impressive!

It also retained that perfect shape when approaching the final tension. This is sometimes a small issue when building with normal carbon fibre rims. They can start to deform at higher tensions. This deformation may only be a very tiny amount but its evidence that the material is not responding well to high tension. The VAR77 held its own nicely even at 120 kgf of tension for the rear wheel.

The Venn VAR77 and the Phil Wood Pro track hubs look absolutely stunning and quite imposing.

The Venn VAR77 and the Phil Wood Pro track hubs look absolutely stunning and quite imposing.

The final test will of course be the ride quality. I will be grilling my client for his thoughts on how the Venn’s feel on the road. I already have a good feeling about these wheels based on how these rims responded in the truing stand. Over the years my intuitions about ride quality have mostly proven correct just from my conclusions about how the rim felt while being built. That may sound odd to some but you can learn a tremendous amount about a rim just by its behaviour in the truing stand. I’ll be back later with the conclusions on the ride quality soon! Stay tuned.

Cognoscenti Cycles website0128Chris KIng R45.jpg

The new Carbon Werx All Road wheels

The “all road” moniker is bantered about a lot these days. It’s usually describing a bike design that enables the rider to traverse lots of diverse road options, from regular smooth pavement to gnarly gravel roads and everything in between.

Such a bike would require a versatile set of wheels that would respond well to all those different road surfaces. Wheels that would give you the ability to swap out different tire widths appropriate to the kind of road you might be taking that day.

A light tire for fast club rides and possibly a more aggressively treaded tire for a day of gravel riding on old farm roads.

Does such a wheel design really work? In a word, I would say yes. Admittedly its a bit of a Swiss Army knife approach but modern carbon rims do offer that degree of flexibility if the right lacing pattern, rim depth, spoke choice, spoke count and hub design are used.

I believe our new Carbon Werx All Road wheel set is the ideal solution. A lot of thought went into getting the balance just right. Remember, these wheels are called upon to perform well in very different situations so a proper wheel design is of paramount importance.

So, just how did we achieve this design goal? My first thoughts went to rim depth. I chose a 49mm deep rim. It’s the deepest rim that I would recommend for tougher gravel roads, yet it’s also just right for a set of fast wheels that will benefit from its aerodynamic strengths. The width of our rim is 31mm and the internal dimension is 24.5mm. The trend toward wider rims marches in lock step with the trend toward wider tires. These rims are optimised for tires between 28 and 45mm wide.

The wider rim also offers some additional lateral stiffness.

The carbon weave is a 3K pattern and this particular set has a glossy finish. It’s quite attractive and offers just the right amount of compliance for rougher road surfaces. I chose a custom blend of Toray T700S and T800 carbon fibre. This is aerospace quality carbon fibre with a perfect strength to weight ratio.

The new Carbon Werx All Road rim. 49mm deep and 31mm wide. Made from aerospace grade Toray T700S & T800 carbon fibre.

The new Carbon Werx All Road rim. 49mm deep and 31mm wide. Made from aerospace grade Toray T700S & T800 carbon fibre.

The next consideration was spoke count. I decided upon a pair of 28 hole rims. Why not a pair of 24 hole rims you might be thinking, as you have seen this done with other companies like Enve for instance.

The weight of 4 extra spokes on each wheel is not worth quibbling over when one realises the added lateral strength and stiffness one achieves when going from a 24 hole wheel to a 28 hole wheel. When you get out of the saddle to sprint on these wheels you’ll immediately feel just how much stiffer and responsive they are and the same goes for climbing hills. All that sponginess and wasted watts from a typical 24 hole wheel has completely disappeared.

You’ll also begin to see the improved ride quality when you hit those gravel roads. That wider more aggressively treaded tire exerts more lateral forces on your wheel and the 28’s will be solid as a rock. The same can’t be said for a pair of 24’s.

Spoke choice was the next obvious consideration and this is more important than you may think. I have a hybrid spoking method that employs different models of spokes on the front and rear wheel. Why am I bothering to split hairs like this? Simply because the front and rear wheels have very different jobs and require different approaches in both final spoke tension and even spoke choice.

On this particular wheel design I am using the Sapim CX Sprints on the rear wheel and the Sapim CX Rays on the front wheel. Both are forged Sandvik steel bladed spokes that are made in Belgium. The CX Sprints have a very slightly meatier profile that works wonders in adding some more lateral strength to a rear wheel. The CX Rays are the lightest bladed spoke that Sapim makes and are ubiquitous in the pro peloton as a highly favoured racing spoke. Super light and super strong. This combination works perfectly for the job that each wheel is required to perform.

I opted for a very conventional and tried and true cross 3 lacing pattern. Why not a cross 2 lacing pattern you ask? Cross 3 has been around for a very long time and this classic pattern provides reliability and strength that is unparalleled. The ride quality is also immediately apparent. Greater lateral stiffness and a livelier feeling set of wheels.

My hub of choice was from Oregon, the Chris King R45D. Already a classic and much loved for several reasons. Chris King now offers a life time warranty which is nice to know for a pair of hubs that might be subjected to some extreme use now and again.

The Chris King R45D centrelock disc hub. Comes with an easily adjustable bearing preload and this hubset has the upgrade to ceramic hybrid bearings.

The Chris King R45D centrelock disc hub. Comes with an easily adjustable bearing preload and this hubset has the upgrade to ceramic hybrid bearings.


The Chris King R45D is a centrelock disc hub with large flanges, 57.4mm to be precise. These big flanges help to make your wheels that much stiffer and stronger, working well with my Sapim hybrid spoke selection. You also have the option of their standard steal bearings as well as an upgrade to a ceramic hybrid bearing. Chris Kings colour ways are great and their anodisation is second to none in the business. Every part on that hub is machined to the finest tolerances possible. Bear in mind there is no longer an option for a Campagnolo freehub should you be riding a Campy drive train, so another hub choice would need to be considered in that case.

The matching front centrelock R45D hub in stunning Matte Bourbon

The matching front centrelock R45D hub in stunning Matte Bourbon

My go to spoke nipple comes from Italy. The Alpina ABS black brass 5.5mm dual ended nipple is simply the best in the world. Alpina has designed a rather clever spoke nipple. Their brass composition yields about 30% greater strength and somehow they have devised a manufacturing process that does not require the use of highly toxic mercury which is a huge environmental boost! The plastic ABS plug in the top of the nipple acts like a thread locker stopping the spoke from ever coming loose as well as being anti vibrational.

The very last thing that brings these wheels to life and provides a superb ride quality and the confidence that these will keep performing great for years to come is the methodology used in our build. Cognoscenti Cycles method of building wheels is utterly unique. I can say this with complete assurance that this is indeed a fact. The attention to detail and the number of steps taken in every wheel that leaves the shop is unique to this company.

Our selection of custom made tools and tools that we have played a part in the final design are numerous. I have partnered with several talented tool makers and this has refined the process of wheel building to a fine art. Our custom made spoke tension meter is one of these tools. My commitment to accurate and correct spoke tension is unwavering. It makes all the difference! Please take a look at the “tool” section of our website which has photo’s and descriptions of many of the sophisticated tools I use daily.

I will not go into great detail on all the secrets of our wheel building methods. They are carefully guarded trade secrets that nobody but myself knows. Suffice to say, your wheels will be built to the highest standard possible in the industry.

If you think you’d like to experience a significant upgrade to some world class all road wheels, let me know and I’ll get you sorted out! Turn around time is usually around 2 weeks if the components are in stock and the price for this set is $2625.00 CAN + tax, with standard bearings. Choice of hub colour, and rim finish is up to you!

The Carbon Werx All Road rim in our P&K Lie truing stand.

The Carbon Werx All Road rim in our P&K Lie truing stand.

The Humble Bicycle Tube

As cyclists we would be nowhere with out the tube. Its been around for well over a century and even though we have rightly cursed them at times we would not be enjoying our daily rides with out them. Yes, many have forsaken them for the modern day “tubeless set up”, but many of us cling to the old tube for one reason or another. Some of us despise tire sealant and the mess that goes along with it, and others are just stuck in the glorious past, comfortable with what we know so well.

Is there a real reason to hang onto the old tube. The answer is yes. In the last year we’ve seen tube technology take immense strides forward as if to say, hey i am still relevant in the modern day! New materials like thermoplastic polyurethane are now being used by companies like Revoloop, Tubolito , Schwalbe and now Pirelli with their bright yellow Smartube.

These new space age tubes boast some impressive attributes that would make you think twice about waving good bye to the tube.

The German made Revoloop tube made from thermoplastic polyurethane. The lightest version weighing in at an incredible 39 grams.

The German made Revoloop tube made from thermoplastic polyurethane. The lightest version weighing in at an incredible 39 grams.


First lets take a look at the weight. Tubolito and Revoloop have tubes tipping the scales at 39 grams and some ultralight models at an unbelievable 30 grams! That’s incredibly light! An independent test was done that showed that a tube at that weight had lower rolling resistance than a wheel set up tubeless. How is that even possible? Apparently the sealant moving around in your tire slowed you down more than a static object like a 39 gram tube. So a 39 gram tube actually has less rolling resistance and is therefore faster!

What about puncture issues. Well, more good news. Tubolito has stated that their tubes are more puncture resistant than either a conventional butyl or latex tube.

But can you repair them? Yes you can, but you have to use their patching kit. Its really identical to patching any bicycle tube but you must use their patches. Simple enough.

Cost? Well they aren’t cheap. A reduction in rolling resistance and the extra degree of puncture resistance comes at a price. Depending on where you purchase them they can run over $40.00 a pop. They are made in Europe where labour costs are certainly more expensive than most other places on the planet.

Can you use valve extenders? Yes that’s feasible. But these tubes also come in various valve lengths so this should enable you to match tubes to your rim depth without issue.

Can you run them at lower pressures. Both Tubolito and Revoloop offer tubes for road and MTB’s. So reasonable lower pressures should be no problem. Its always good to ensure that the tube you have chosen makes sense for the tire you plan to ride. A proper match dimensionally will go a long way in assuring a long life for both tire and tube.

Can you put sealant inside the tube to further diminish your likelihood of a puncture. No, these tubes are not designed to work with tire sealant.

Made in Germany, the new Schwalbe Aerothan tube which comes in several sizes and subtle differences in weights.

Made in Germany, the new Schwalbe Aerothan tube which comes in several sizes and subtle differences in weights.

So a premium tube comes at a premium price, but if you want the best performance you might just move up into the world of world class tubes. I have road tested the Tubolito’s myself and I am a convert. The ride experience paired with some Vittoria Corsa Control 2.0 Graphene tires was sublime. A cloud nine ride.

I managed to run over a huge roofing nail that went through my tire like butter in two places producing some serious holes! I used a Park tire patch to get home and later decided I would try my hand at patching the Tubolito with two rather large holes in it. Truth be told I didn’t hold out much hope for that repair and was pleasantly surprised that one patch covered both holes. That same repaired tube is back on my bike and its working fine.
I’ll be testing the new German made Revoloop tubes on another set of road wheels to see how they compare. I have every confidence that they will perform similarly. I’ll keep you posted with my conclusions.

Cognoscenti Cycles are now selling the Revoloops, Tubolitos, Pirelli P Zero Smartubes and the Schwalbe Aerothan tubes. Give us a ring for correct sizing and a price.

The Tubolito tube which is made in Austria. I kind of like this screaming orange colour. Orange is the new tube! Deal with it!

The Tubolito tube which is made in Austria. I kind of like this screaming orange colour. Orange is the new tube! Deal with it!

The screaming yellow Pirelli P Zero Smartube. Made in Austria. Very light and very strong.

The screaming yellow Pirelli P Zero Smartube. Made in Austria. Very light and very strong.

M is for Methodology

Methodology. A word that reverberates in my head quite a bit. Its a specific approach and a way to do things properly. Something that requires time and nurturing.

The dictionary sites the origin of the word method as such. ORIGIN

late Middle English (in the sense ‘prescribed medical treatment for a disease’): via Latin from Greek methodos ‘pursuit of knowledge’, from meta-(expressing development) + hodos ‘way’.

Your tools will inform your methods through both time and trial & error. Fortunately we have access to some pretty sophisticated tools!

Your tools will inform your methods through both time and trial & error. Fortunately we have access to some pretty sophisticated tools!


Over the years I have refined my process of trying to build the best wheels possible. In 1973 it all started with some very simple tools, but they were more than good enough to produce some very impressive wheels if you took your time. Gradually new and better tools came into existence and they were embraced , though this always meant going back to the drawing board with your methods.

It was during that first year of building that i did something rather audacious. I dared to challenge the status quo by questioning conventional lacing patterns that were probably a 100 years old. One day I was stairing at a wheel that I just built and it dawned on me that there just might be a different way of lacing a bicycle wheel that could be superior. I ruminated on that thought and then decided I would pose this question to an engineer that sometimes dropped into the shop. One day he showed up at the bike shop and I sheepishly asked him if there was any merit in my idea, He listened to me and then went silent for what seemed like a an hour and then looked up at me and said, “well, your new lacing pattern would eliminate the stress riser on half of the spokes and thats a good thing” . Why don’t you build some wheels and see what happens”

That was enough for me to give it a whirl. I started building all my wheels with this symmetrical pattern instead of the conventional asymmetric pattern that virtually everyone else used no matter what country they were built in. My pattern had all the pulling spokes going in the same direction instead of opposite directions like all other wheels. All my pulling spokes left the flange cleanly without touching it and this eliminated the stress riser common to other lacing patterns.

This was probably the first time that I realised I was becoming very aware of methodology. Methodology mattered. This was no small thing. I was challenging every wheel builder in the world. Essentially telling them there was a better way.

Well, 47 years later and I still lace all my wheels in this fashion. Many other wheel builders around the world have adopted this lacing pattern and I am sure many have ignored it. Is it better? I’d say so.

This blog entry would be far too long if I went into all the reasons why I feel this is superior so I’ll leave that for another day, but suffice to say I realised the value of challenging traditional methods and thinking outside of the box.

I noticed that Enve now builds all their wheels with this lacing pattern. Its been acknowledged by some who have written books on the topic but I have never seen my name credited for this innovation. It matters little to me because I know who got there first.

I would say that this departure from the norm encouraged me to think independently and to fearlessly question anything I felt could stand some improvement. This was the birth of my very own methodology.

I was in a good situation to experiment because this was the era of the “bicycle boom” and I was being exposed to all sorts of new components and getting constant feedback from serious cyclists. As I have said before “this was the crucible that forged all my methods”.

Its amazing how much you can learn on virtually any topic if you dive deep enough down the rabbit hole and resist getting either jaded or cocky. As an old friend who worked at NASA once said, “The mind is like a parachute, it doesn’t work very well when it isn’t open”

It would be impossible to relate every last story and every change I have made along the way but I can say its been a constant evolution. Much of it driven by an increased knowledge of the material science required to understand why things work or fail. Its helped me immeasurably to learn about various metals and their intrinsic properties and now about carbon fibre and how that informs modern rim design and many other materials as well. Admittedly its not everyones cup of tea to fill your night time reading with the behaviour of 6061-T6 alloy under certain stresses or the importance of specific carbon lay up to achieve superior bicycle rims. But taking the time to understand these things has proved invaluable.

Its all helped to shape the way I build wheels. Remember, my goal wasn’t just to be a pro wheel builder. My goal was to be the best wheel builder in the world. That requires a lot of work and a unique approach.

Along the way I ran into a very interesting and relevant question about spoke tension. Should I continue to rely on my highly developed “feel” approach to correct spoke tension that I had trusted implicitly for decades? It had never once let me down and I prided myself on having acquired such reliable sensitivity to a wheels final tension.

But new tools were starting to emerge that supposedly measured this tension for you and gave you some sort of idea of a final tension in KGF. Kilograms of force for the uninitiated.

At first I balked at this notion that one needed such information and wondered if I should start relying on this tool to dictate my spoke tension. I kept asking myself if my “feel” had ever let me down and the answer was NO it had not. So for a long time I never bothered giving it much thought and kept building with my time honored methods.

Then I came across a situation where real hard numbers would have settled an argument about whether I had built a wheel to someone else’s notion of an ideal finished tension. I then realised that I didn’t have any quantifiable measurements that I could provide to convince someone of my expertise.

At that moment I started to see the benefit of recording these measurements to have some sort of record I could look at months or even years later to confirm that I had used an identical approach with a specific rim and hub combination. I could also talk numbers with others in the industry and we’d all have something that we could agree upon as a reliable guide.

I was quickly becoming a convert to the “spoke tension meter”. A new rabbit hole presented itself. I dove down to the bottom to see what I would find.

Being a complete tool junkie, it wasn’t long before I bought myself a good quality spoke tension meter. It was The DT Swiss Tensio 2. An analogue meter that was used by quite a lot of wheel builders who had embraced this before myself.

I quickly determined that this tool had its strengths and its weaknesses. This led to the search for a meter that didn’t have any limitations.

I was quite fortunate to stumble across a meter for sale that looked like it was made by some spoke tension guru. It seemed to tick all the boxes and I wanted that one! I ordered it and was blown away with the quality of workmanship and accuracy that this meter had. It also eliminated some of the inherent problems in the DT Swiss meter that bothered me.

This began a relationship with Filip Kralyevski, the designer and builder of this high quality tool. Filip is an interesting character who has a brilliant mind for design problems and is also able to actually make the things he dreams up!

Cognoscenti Cycles collaborated with this master CNC man and genuine design guru to produce the worlds best spoke tension meter. Filip’s talents are special. He’s not a pro wheel builder but he’s listens to your input which translates to a superior end product. He’s a perfectionist who goes straight back to the drawing board when its not just perfect. Our collaboration produced an amazing meter that I firmly believe is better than any currently available. Its degree of both sensitivity and accuracy is unparalleled. Its also quite robust with the best parts we could find. That tool helped shape my wheel building methodology in a way that I could have never envisioned prior to its existence. Its added a considerable amount of time to my build because I now take a brand new step that simply didn’t exist before this tool came along. I am happy to increase my build time to attain a new level of accuracy previously unattainable.

As time has marched on I have learned to not get too set in my ways and not to greet change with a degree of suspicion and hesitancy. I love experimenting with new tools to see how they can be incorporated in my work flow. Do they make better wheels? Did it make the chore somewhat easier? Most importantly did it increase accuracy. It always seemed to boil down to that. I am constantly striving to obtain an almost unachievable level of accuracy.

Its that mad desire to chase the ever elusive goddess of perfection. We all intrinsically know this is an unattainable dream but we press on nevertheless.

The Cognoscenti Cycles spoke tension meter. A CNC machined body with a Swiss made Atorn dial indicator. The THK linear roller bearing minimises unwanted friction to almost nothing.

The Cognoscenti Cycles spoke tension meter. A CNC machined body with a Swiss made Atorn dial indicator. The THK linear roller bearing minimises unwanted friction to almost nothing.


A Blast from the past…

Its always interesting to look back and see what’s changed and what’s the same. For instance, I am still using several tools that I started using in the 70’s. If it ain’t broke don’t fix it! The Campagnolo dishing tool that had its debut in 1952 remains basically unchanged and vintage ones fetch a pretty penny on Ebay regularly. Some claim they have improved on this design but I am not convinced. So I soldier on with my trusty Campy dishing tool that still delivers the goods.

The Campy dishing tool, first scene in the 1952 Campagnolo catalogue. This invaluable tool has stood the test of time.

The Campy dishing tool, first scene in the 1952 Campagnolo catalogue. This invaluable tool has stood the test of time.


Some tools have come full circle. Back in the early days I used an ancient Yankee driver to help speed up the lacing task. This tool was older than Methuselah! As the years ticked by I eventually became parted with that tool and somehow I kind of forgot about it. One day I was lacing up a wheel and I recalled that it seemed much easier and quicker when I had a Yankee driver. I searched the web to find one and was disappointed to find out that Stanley no longer made them. I continued my relentless search as any tool junkie would and finally came across a company in Germany who had done a faithful recreation of the old 19th century Yankee driver. So I ordered one up immediately and rejoiced when the mailman finally dropped it off. Its 1973 all over again and life is good!

What’s old is new again! My new German Yankee driver replete with a handful of different bits for different types of nipples. I can drive DT Swiss Torx, old school slot head for vintage builds and 3.2 mm double square nipples for both internal ( Env…

What’s old is new again! My new German Yankee driver replete with a handful of different bits for different types of nipples. I can drive DT Swiss Torx, old school slot head for vintage builds and 3.2 mm double square nipples for both internal ( Enve) and external nipples.

I am always looking for new tools to make things easier, faster, and more accurate but sometimes a new tool surfaces that didn’t exist before and someone just dreams up a new approach to an old problem. One of those was the new Unior Hub Genie. A clever tool that enables you to remove stubborn hub end caps that should normally just pull off by hand.

The Unior Hub Genie. A new tool to help remove tight end caps. Two different versions enable you to remove all sizes of end caps.

The Unior Hub Genie. A new tool to help remove tight end caps. Two different versions enable you to remove all sizes of end caps.

A new edition to my growing assortment of tools is the Roval spoke holder. This handy tool grips the spoke tightly to stop it from twisting or “winding up” as we say. Light weight spokes have a tendency to do exactly that when under higher tension and this can cause problems while building. The Roval tool stops this wind up from occurring while you make adjustments to the nipple. Invaluable!

The Roval spoke holder is an indispensable tool for stoping unwanted spoke wind up. Its a bit heavy but saves me a trip to the gym to lift weights!

The Roval spoke holder is an indispensable tool for stoping unwanted spoke wind up. Its a bit heavy but saves me a trip to the gym to lift weights!


My Park truing stand is another stalwart tool that I love. A simple heavy chrome plated beast that keeps going no matter how old it is. Mine has no fancy dials or any real upgrades, yet I still build wheels within ridicuously fine tolerances at even tension. Wheels that Egan Bernal or any top racer would be happy to be riding their most important races on. Nuff said.

Are there newer fancier truing stands out there? In a word, yes. If you’ve got the dough you can buy a lovely P&K Lie stand from Germany that’s a work of engineering art. Fancy dials and numerous brass fittings that make this the Rolls Royce of wheel truing stands. There are other high end stands like the one from Aivee in France. Its a gorgeous stand in a Ferrari red colour that rivals the P&K Lie for most stunning stand on the planet. Lastly is a creation from the UK that also is a beautiful work of CNC art. Bicycle Manufacturing has been making their model for a few years now and it also boasts super fine tolerances and just looks amazing.

DT Swiss has a truing stand that is their attempt at refining the wheel builder experience. Personally I wasn’t enamoured with how that stand functioned in real life. I bought one, hoping for an improved building experience and it left me cold. After only using it on one pair of wheels I quickly realised it was not my cup of tea. It was promptly boxed back up and sent back to Bike 24 for a full refund.

Will I buy another wheel truing stand? Probably…. When you are constantly refining your methodology you loose sleep over how to get to the next level and this usually involves experimenting with new tools.

Not all are perfect fits and you realise that something may work for another builder but its feng shui is definitely not for you!

This is why there are so many different approaches to wheel building. One guy/gal relies on truing by ear and another guy does something completely different and somehow both people build great wheels.

There are numerous other comparisons that could be highlighted but you get the point. And we all have our secrets. The black art of wheel building is shrouded in many secrets. We have more secrets than the Freemasons! So, I am guilty as charged! I have numerous techniques that I can honestly say I have never revealed to any other wheel builders. Even when I give wheel building seminars I am careful to leave out all of my special techniques! They are trade secrets, some new and some old, and they may follow me to the grave!

Made in Switzerland you say…

I recently bought a tool that came from a wheel builder in Switzerland. Blackcat Wheels has an excellent load cell custom made in cooperation with Tomasz from Fetish Bike.

This fantastic tool enables us to calibrate our new spoke tension meters to an incredible level of accuracy. It also enables us to evaluate new spoke models that require tension charts for our meters. This is a huge step forward in guaranteeing ideal overall spoke tension in every wheel we build. Chasing perfection like never before!

A collaboration between Fetish Bike and Blackcat Wheels in Switzerland. A beautifully made tool that facilitates the calibration of spoke tension meters to a super fine tolerance. The purple meter on the right is the Cognoscenti Cycles meter.

A collaboration between Fetish Bike and Blackcat Wheels in Switzerland. A beautifully made tool that facilitates the calibration of spoke tension meters to a super fine tolerance. The purple meter on the right is the Cognoscenti Cycles meter.

These sophisticated tools are usually not seen in large wheel building factories. They require seasoned expertise and extra time to build in this manner to produce the finest wheels in the world. But this is what differentiates us from wheel building factories. Small boutique wheel building companies build in a VERY different way in comparison to their wheel factory competition. Make no mistake, there is absolutely no comparison!

In this world of fine tools and know how, I have to give a shout out to Ric Hertjberg. He’s the owner and brains behind Wheel Fanatyk. This company sells wonderful tools to both budding and seasoned professional wheel builders, Ric has been at this wheel building game for almost as long as I have and has tons of experience at all levels of building. Who would know better what tools you’d need to build great wheels than him. Check out his website when you are hunting down the right tools to lead you to wheel mastery.

Ric has given us such gems as the Morizumi spoke cutting and threading tool. I bought one of these last year and its quite an impressive tool on several levels. Originally designed and built in Japan by Morizumi Masakazu who once worked for the Asahi Spoke Company. This super robust tool does a perfect job of allowing you to cut spokes within a half millimetre and with perfect threads rolled each and every time. There really is nothing that quite compares. It is now made in the USA with a few small improvements from its original design. Ric oversees its manufacture and tests each one before it goes out the door. If you custom cut spokes, then just buy one. Yes, they are hardly cheap, but it will make spoke cutting a joy. You won’t regret it.

The Morizumi spoke cutting and threading tool. A must have tool in a pro wheel builders arsenal. Available from Wheel Fanatyk. Thanks Ric!

The Morizumi spoke cutting and threading tool. A must have tool in a pro wheel builders arsenal. Available from Wheel Fanatyk. Thanks Ric!


Over the years all these new tools have given birth to subtle refinements of the entire wheel building process. Nobl’s wheel lacing jig is a new tool that makes a three handed job into an easy two handed job. It also doubles as the perfect tool to apply new rim decals. Kudos to Johnny!

I have to mention two little tools that I wish existed 40 years ago. The Mulfinger from EVT and the nipple shuffler from Wheel Fanatyk. Those humble tools make lacing a wheel so much faster and easier.

Efficient Velo Tools handy Mulfinger nipple tool. It comes in two lengths and certainly helps to speed up the lacing process! Paired with the Wheel Fanatyk nipple shuffler and you just made wheel building that much easier.

Efficient Velo Tools handy Mulfinger nipple tool. It comes in two lengths and certainly helps to speed up the lacing process! Paired with the Wheel Fanatyk nipple shuffler and you just made wheel building that much easier.

I would be remiss if I failed to mention how many different bladed spoke holders exist. All of them do the same job but they all are slightly different in how they fit in your hand and how much of the spoke they grab.

Over time i have found the best time to use each one of them. Some I use at earlier stages of the build when the spokes are not under great tension and then I transition to a different one when tension becomes increased.

DT Swiss has two ingenious models that dovetail nicely with their spoke key. For rims with internal nipples the longer plastic models by Icetoolz and Birzman work wonderfully.

Some of the bladed spoke holders tools that i use regularly. Lots of different shapes and sizes to work with!

Some of the bladed spoke holders tools that i use regularly. Lots of different shapes and sizes to work with!

With new spoke nipples the need for the right tools to turn them has arisen. The photo below will give you an idea of just how many tools I own to just turn spoke nipples. There are different interfaces, like 3.2 mm square heads, 5.5mm hex heads and DT Swiss’s Torx nipples to name just some of the sizes that exist.

These are just some of the many tools required to turn spoke nipples. Will there be more in the future? Undoubtedly!

These are just some of the many tools required to turn spoke nipples. Will there be more in the future? Undoubtedly!

As you can well imagine all these tools will lead to a multiplicity of different approaches for their use. Every pro wheel builder will eventually decide how he thinks a wheel should be built and finished. Probably no two methods will be identical.

This is not just in the world of wheel building. Every artisan making anything will come to his own conclusions on what the best methods are. In the end the proof will be in the pudding as the say!

There are some new amazing custom tools on the horizon for Cognoscenti Cycles that will help to once again refine the process. What are they? That would be telling! Got to keep those secrets secrets.

P & K Lies 3.25 spoke key. Its four sided and fits ultra snug which is great for use on anodised nipples, reducing the likelihood of leaving marks on a new nipple.

P & K Lies 3.25 spoke key. Its four sided and fits ultra snug which is great for use on anodised nipples, reducing the likelihood of leaving marks on a new nipple.